
Before You Begin
- You need permission to create the kind of record you're importing (expirations, contacts, locations, etc.).
- The wizard accepts standard spreadsheet formats —
.xlsx,.xls, and.csv. - Each step in the wizard is linear, meaning you complete one step before moving to the next. You can step back to make changes at any point before final import.
- Related articles:
The eight steps at a glance
A progress stepper across the top of the page shows where you are:
- Upload — pick the file from your computer.
- Preview — review the rows the wizard read from your file.
- Entity Type — tell the wizard whether this is a contact, expiration, location, etc. import.
- Mapping — match your spreadsheet's columns to fields in the app.
- Data Cleaning — fix common issues (blank cells, bad email formats, date format mismatches).
- Duplicates — review records that match existing data and decide what to do.
- Import Preview — see exactly what will be created or updated.
- Import — commit the import.
Step-by-Step Instructions
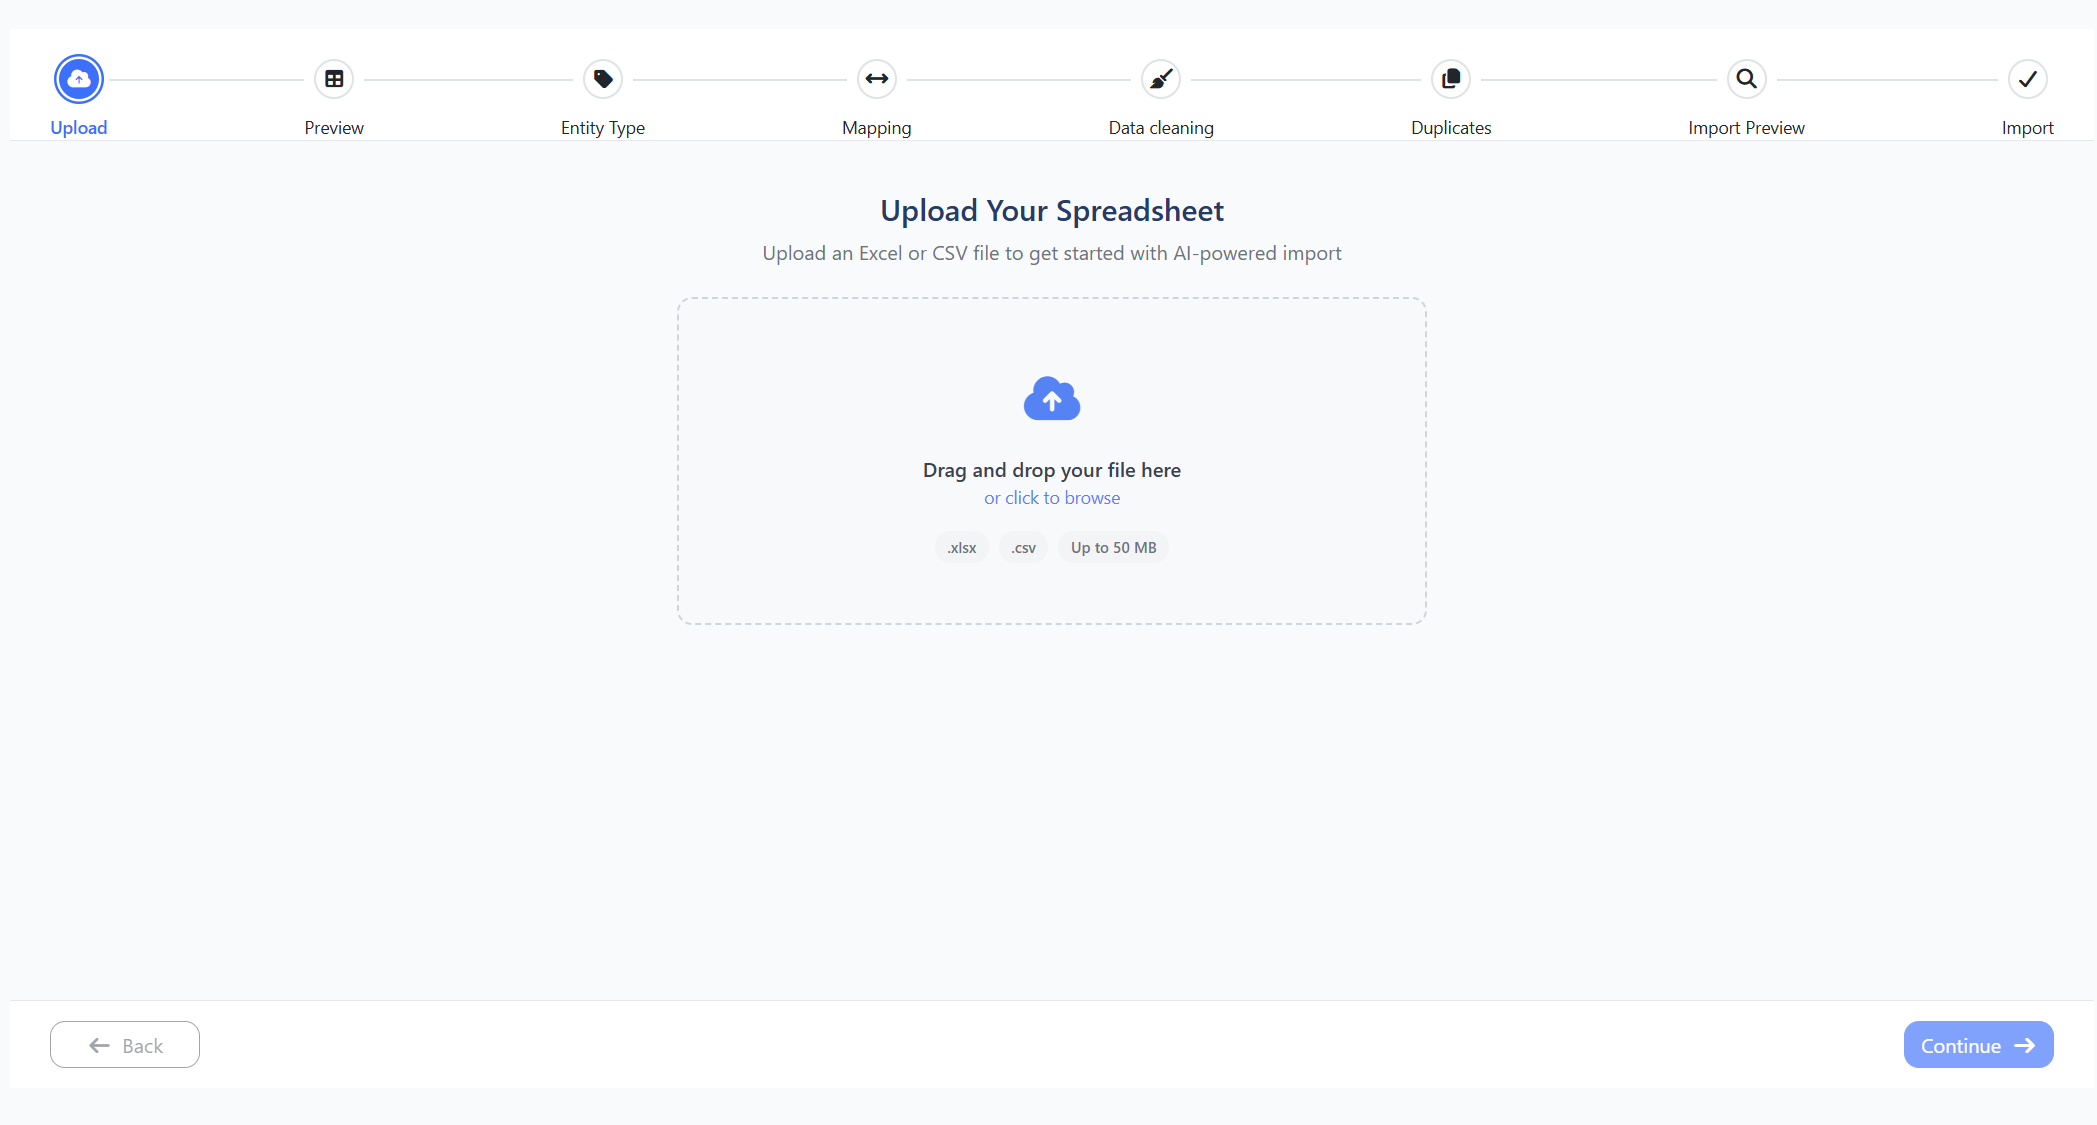
Step 1: Open the wizard and upload your file
- From the left sidebar, navigate to the list you want to import into (for example, Expiration Items, Contacts, Locations).
- Click the Import button (or open the wizard directly from the URL
/ai-import). - Drag your spreadsheet onto the upload area, or click to browse.
- Wait for the upload to finish, then click Next.
Step 2: Preview the file
The wizard shows the first few rows it read from your spreadsheet, including a header row. Verify:
- Column names look correct.
- Data is on the right rows (no extra header rows above the data).
- Special characters and accented letters appear correctly.
If something is off, go back, fix the file in Excel or Google Sheets, and re-upload.
Step 3: Confirm the entity type
The wizard suggests the most likely entity type based on the file's column headers. Confirm or change the choice:
- Expiration Items
- Contacts
- Locations
- Equipment
- Vehicles
- Companies
Click Next to continue.
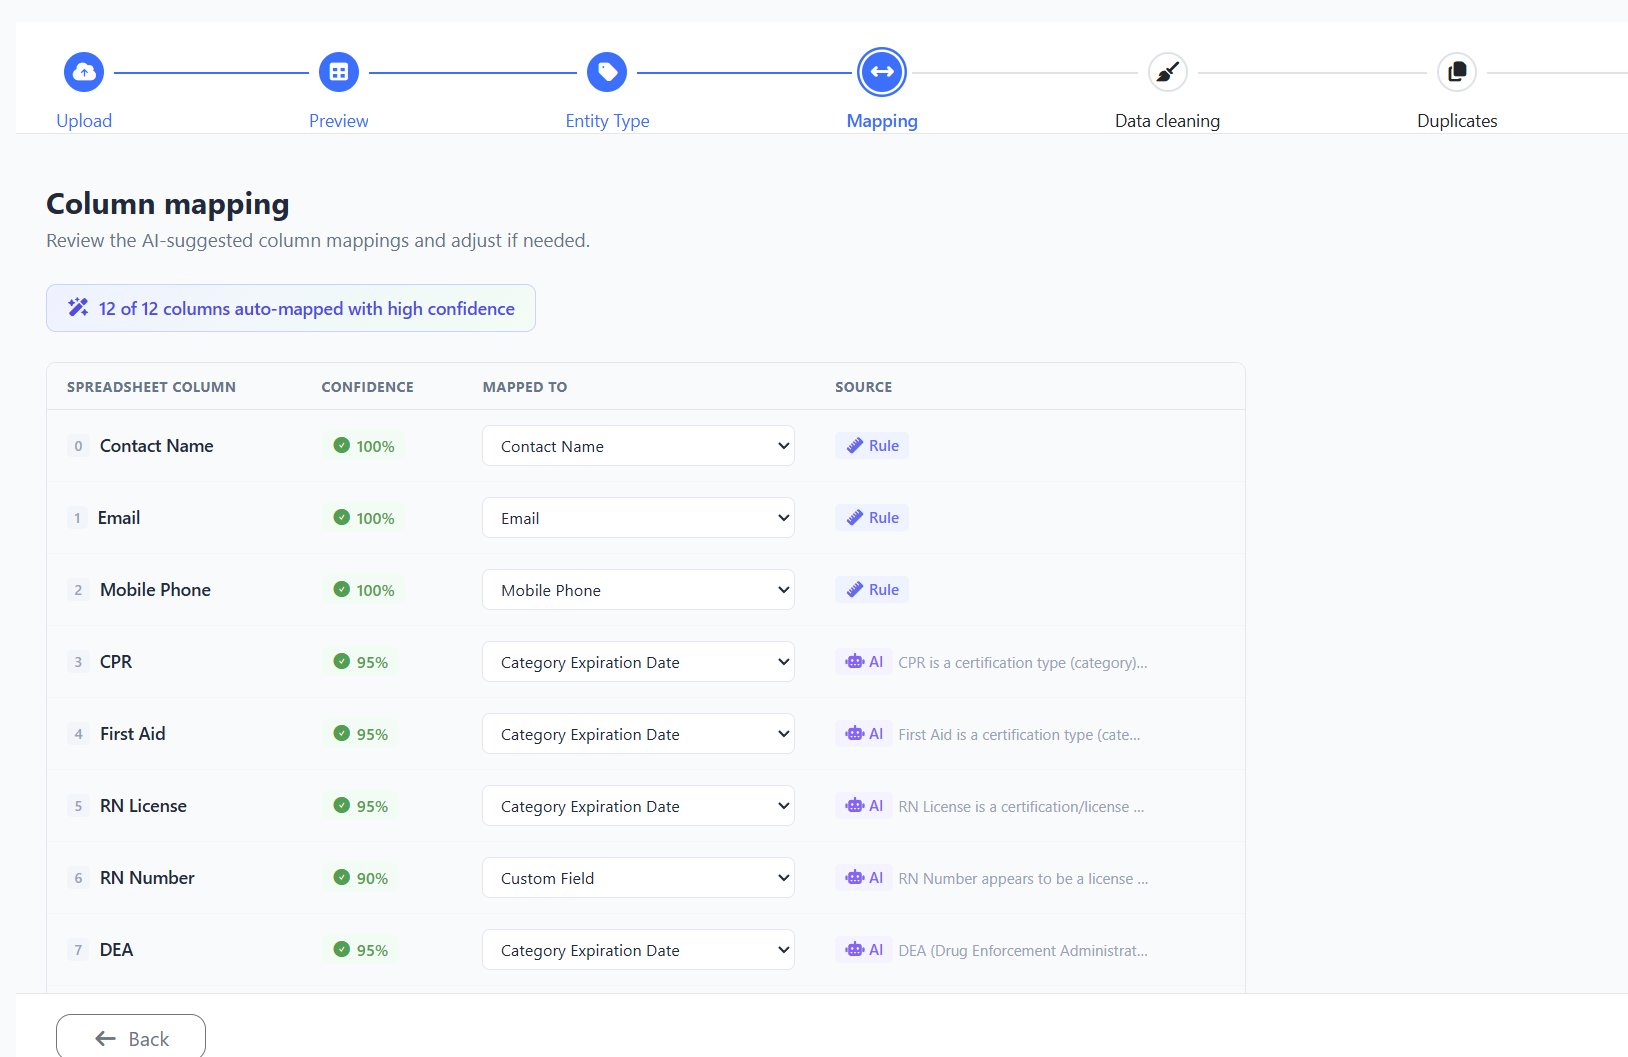
Step 4: Map your columns to fields
The wizard tries to auto-match your spreadsheet columns to fields in the app (for example, "First Name" → First Name, "Mobile" → Phone).
- Review each mapping. For any column the wizard couldn't guess, pick the matching field from the dropdown.
- To skip a column (don't import it), pick Do not import from its dropdown.
- Click Next when every column is either mapped or skipped.
Step 5: Clean your data
The wizard scans every row for common issues:
- Blank required fields
- Email addresses missing the @ sign
- Dates in unexpected formats
- Phone numbers without country codes
For each issue, you can fix it inline, accept the wizard's suggestion, or skip the row. Click Next when you've resolved the issues you care about.
Tip: You don't need to fix everything. Rows that still have issues will be skipped at import time — you can re-upload those rows in a follow-up file.
Step 6: Handle duplicates
The wizard checks each row against the records already in your account and groups likely duplicates.
For each detected duplicate, choose:
- Skip — don't import this row.
- Merge — combine the new data into the existing record.
- Create new — import as a separate record (only do this if you've confirmed it's not really a duplicate).
Click Next when you've made a decision for each duplicate.
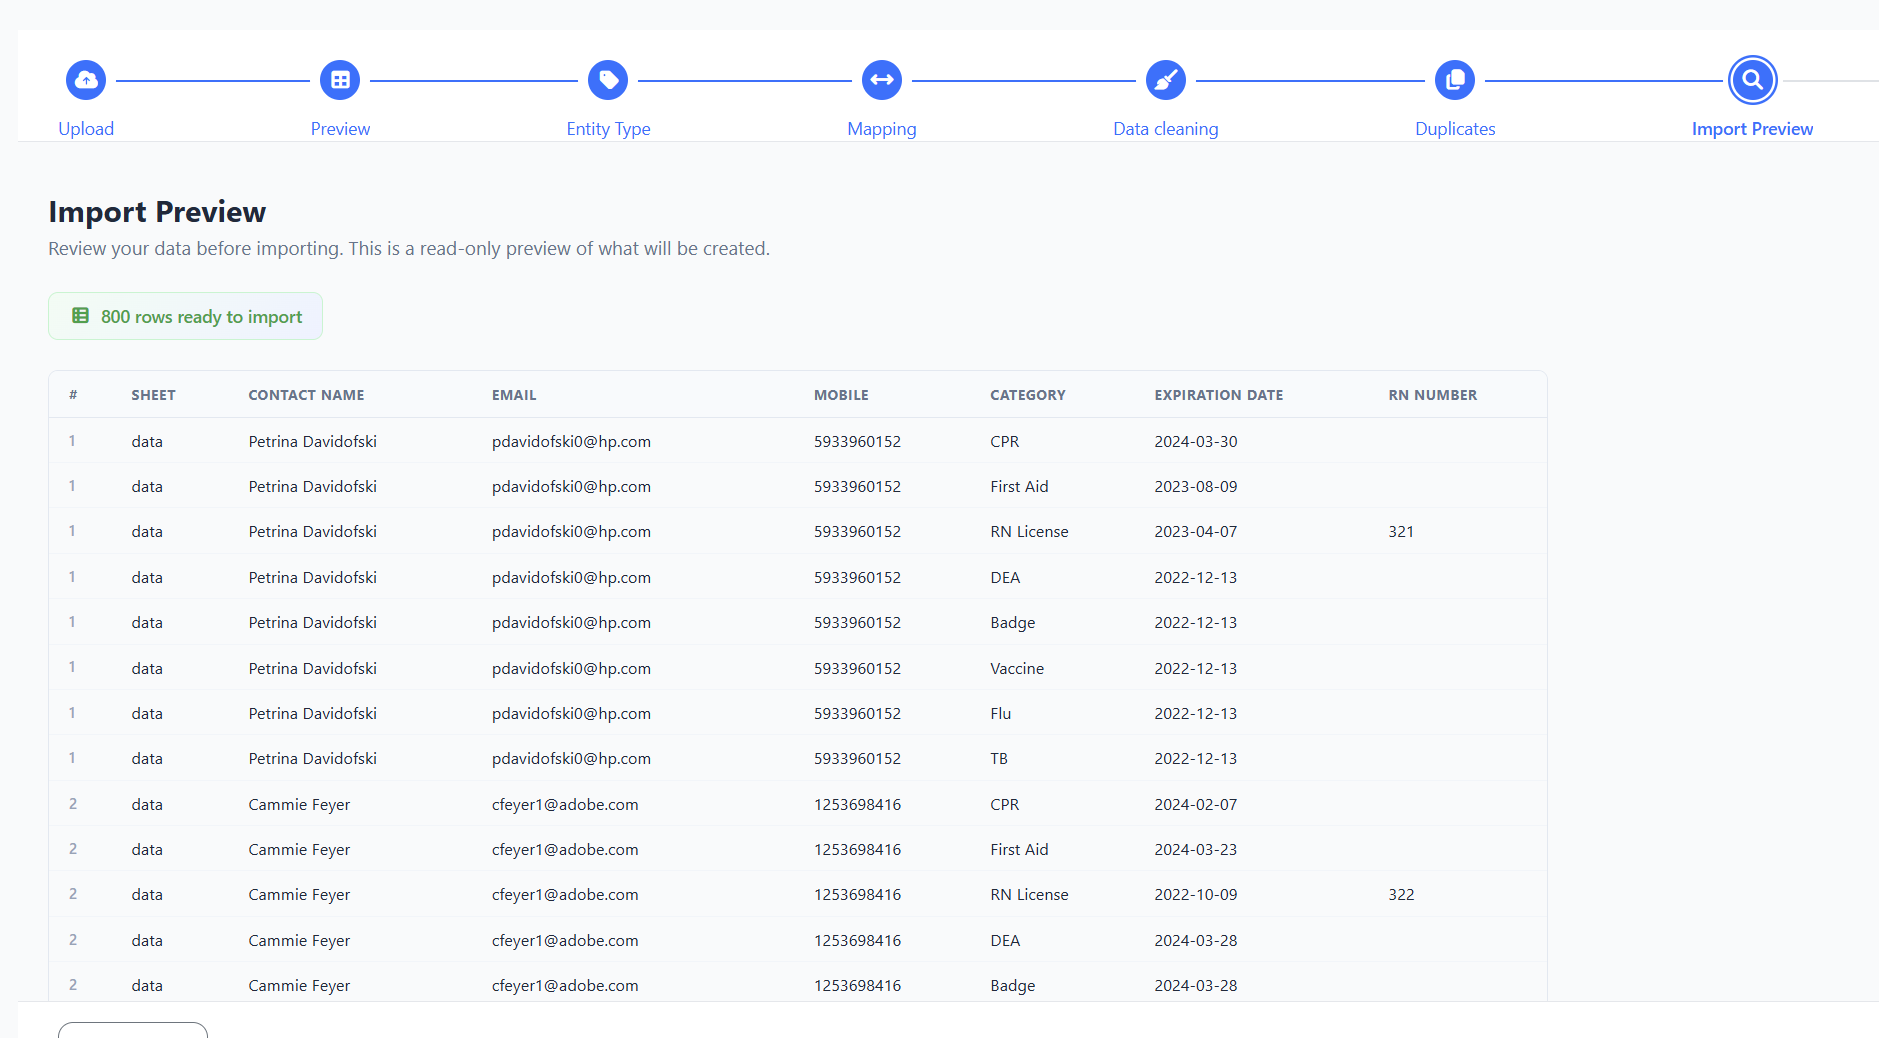
Step 7: Review the import preview
The wizard shows a summary of what will happen:
- How many new records will be created
- How many existing records will be updated
- How many rows will be skipped (and why)
Read this carefully. If anything looks wrong, click Back and adjust earlier steps.
Step 8: Run the import
- Click the Import button to commit.
- The wizard runs the import in the background and shows progress.
- When done, a summary tells you exactly how many records were created, updated, or skipped.
Tips & Best Practices
- Start with a small file. Import 10–20 rows first to confirm your mapping is right, then re-run with the full dataset.
- Keep one column per field. Don't combine "First Name Last Name" into one cell — the wizard maps best when each field has its own column.
- Use the duplicate step. Almost every import has a few duplicates. Set them to Merge instead of Create new to avoid messy data.
- Save the file you imported. Keep the original spreadsheet — if something looks wrong after import, you can compare against the source.
Troubleshooting
- Issue: The upload step fails or times out.
Solution: Very large files (10,000+ rows) can time out. Split the file into smaller batches and import each separately. - Issue: The wizard isn't matching my columns automatically.
Solution: Rename your spreadsheet headers to match the app's field names exactly (for example, use "Email" instead of "Email Address"). Re-upload, and the auto-match should work. - Issue: I clicked Import by mistake.
Solution: Imports cannot be undone in one click. You'll need to manually delete or update the affected records — use the Bulk Edit tools on the list to do this efficiently. - Issue: My dates imported one day off.
Solution: This is usually a time-zone issue with the source file. In step 5 (Data Cleaning), use the date format picker to tell the wizard which format your file uses.