Locations
Find out how about Locations and how to add them to your account
What are Locations?
Locations allows you to group expiration items together by Company Location or Site Location, etc. It provides you with a different way of viewing your Expiration Items instead of just viewing them by list.
Although the default name of this grouping is 'Locations', you can use this feature to group your items for anything - and the heading name can even be changed (more on this below).
Examples of when you can use Locations, if you’re tracking permits and certifications as a building manager, you can use your different buildings as Locations. If you're tracking employee certifications, you can use your different company branches as Locations.
- Adding a New Location
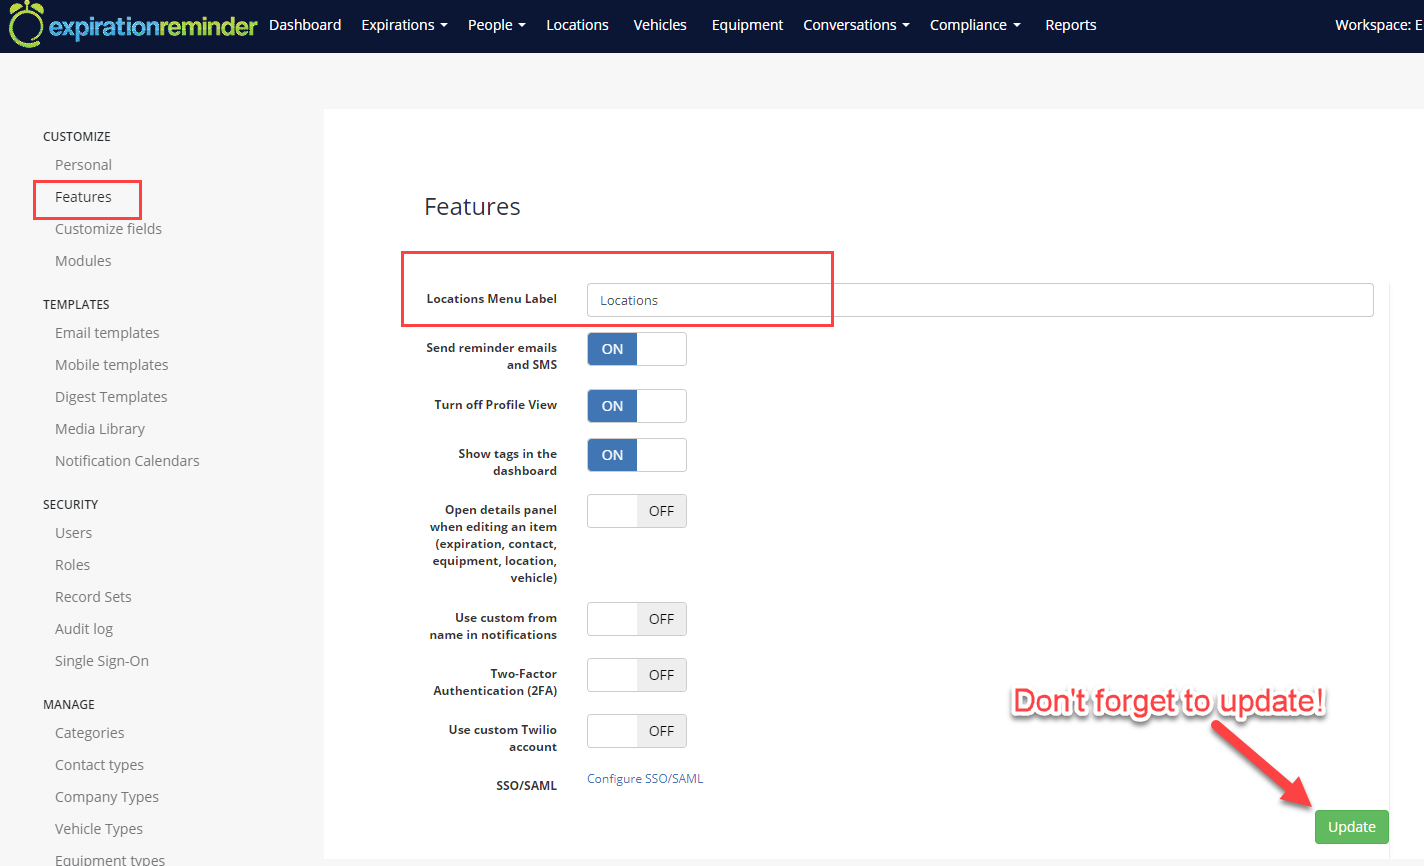
- Changing the "Locations" Heading in your Toolbar
- Location Hierarchies & Parent Locations
- Removing the "Locations" Module from your Toolbar
Adding a New Location
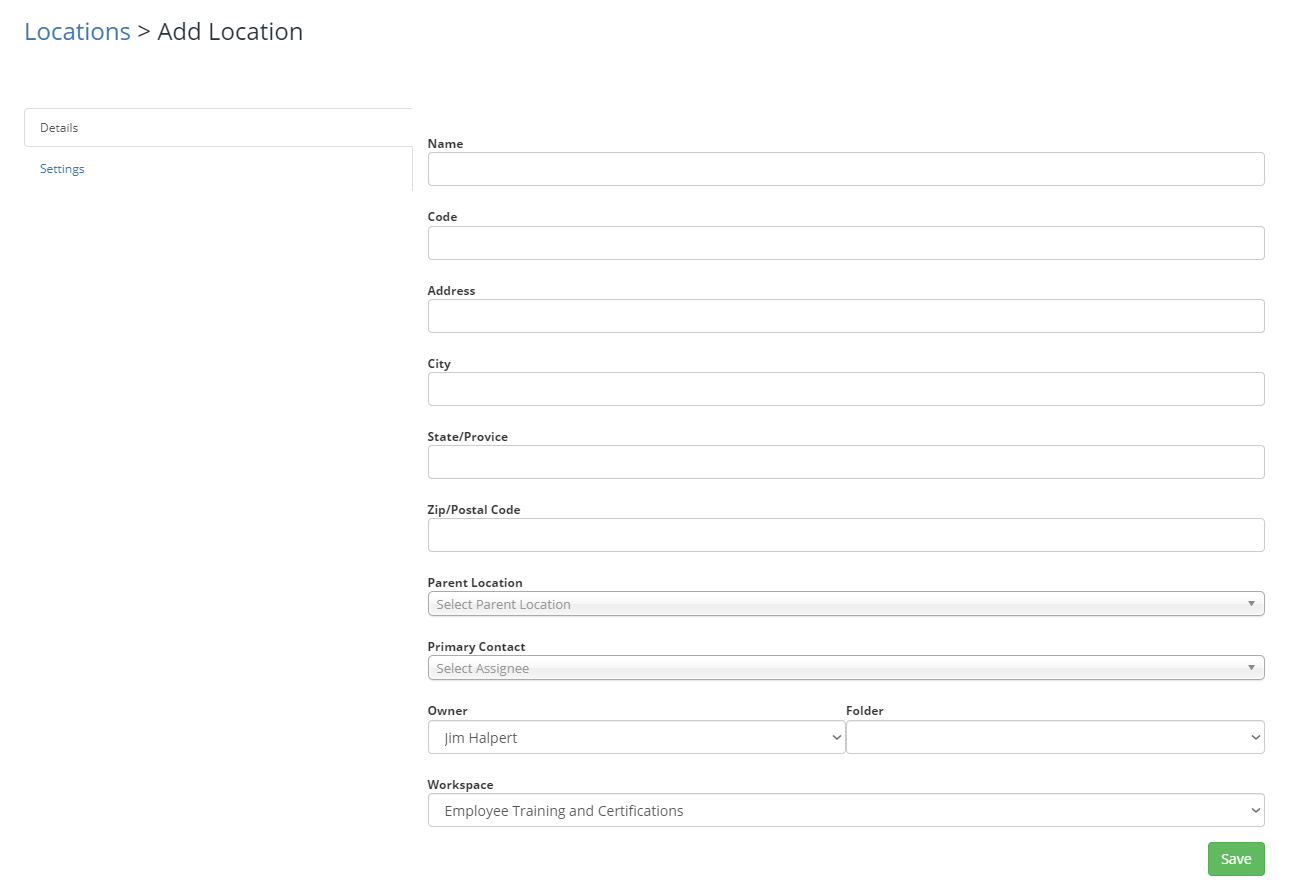
To add a Location, click on 'Locations' on the top menu and then click on the New Location green button.
From the new Location screen, enter the information you'd like available for the Location:

Then click Save.
Changing the Locations Heading
If you would like to present the 'Locations' heading as a name other than 'Locations' - you may edit this in "Features" under the Customize heading (screenshot below).


Location Hierarchies & Parent Locations
The Locations feature in Expiration Reminder allows you to create hierarchies between locations. For example, you can configure "USA" as a location and then assign individual states, such as "California" or "Texas," as locations with "USA" as their parent.
This setup enables you to filter expiration items by specific locations or groups of locations without viewing all of them at once.
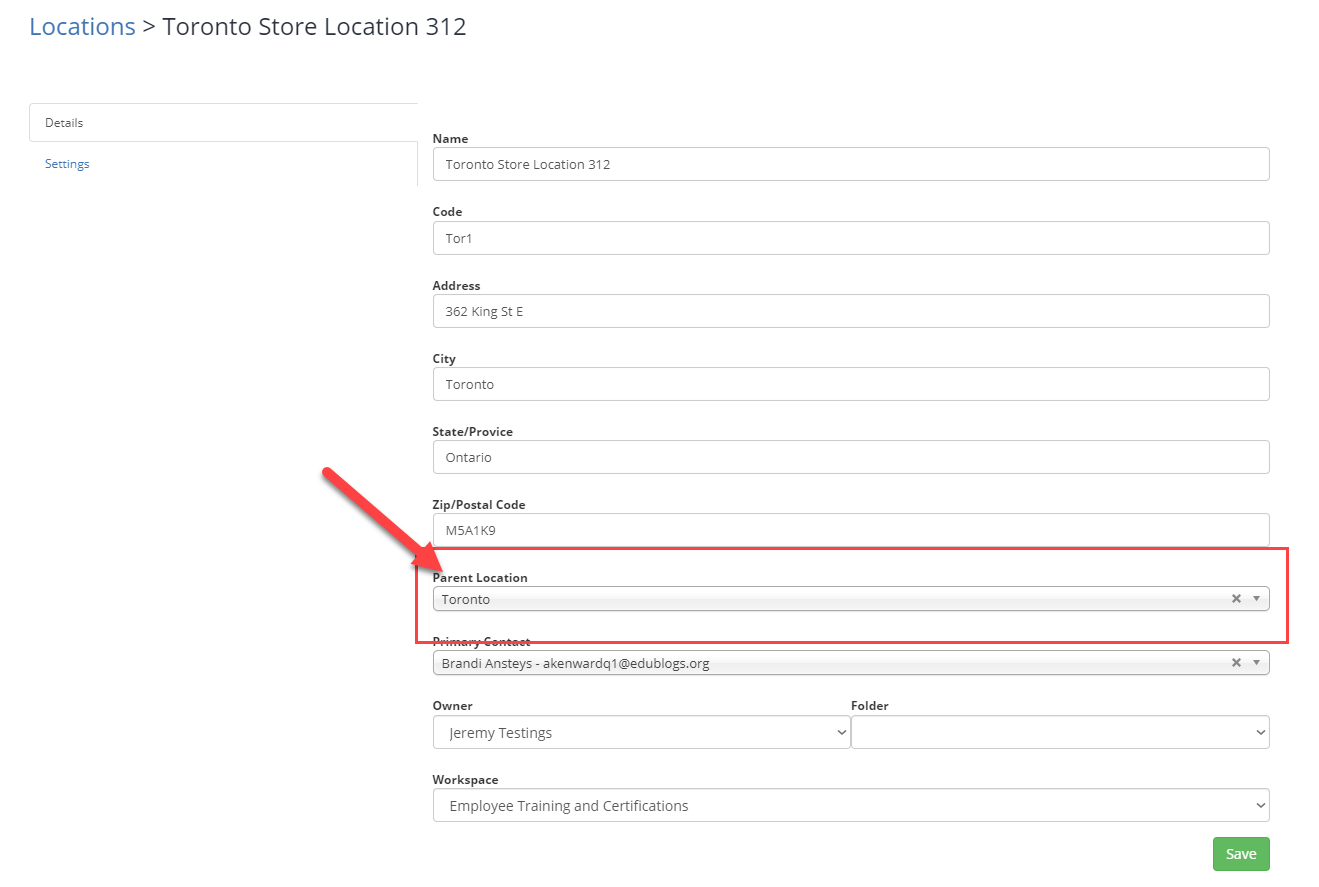
Parent locations are created like any other location. A location becomes a parent location once it is assigned as another location's parent in the "Parent Location" field during the location creation or editing process.
To establish these hierarchies, simply use the "Parent Location" field while adding or editing a location.

Removing the Locations Module
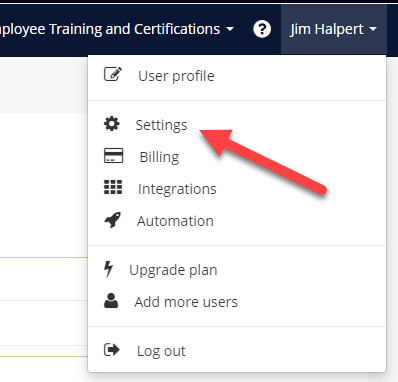
If you find you do not use "Locations" you can hide it from view. This will prevent other team members from using it accidentally.
Only Admin Users of your account will have this capability.

