Acknowledgments allow Contacts receiving notifications to enter information regarding the expiration document that generated the notification.
When acknowledgments are enabled, all notifications will include a link at the bottom that, when clicked, will open a form where the user can enter information such as:
-
Answering a yes/no question
-
Updating the expiration date
-
Viewing files related to the expiration
-
Adding new files for the expiration
This allows the Contact to self-serve and keep information up-to-date.
Enabling Acknowledgments for Document Types
To enable acknowledgments at the Document Type level, edit the Document Type and configure the acknowledgment settings.
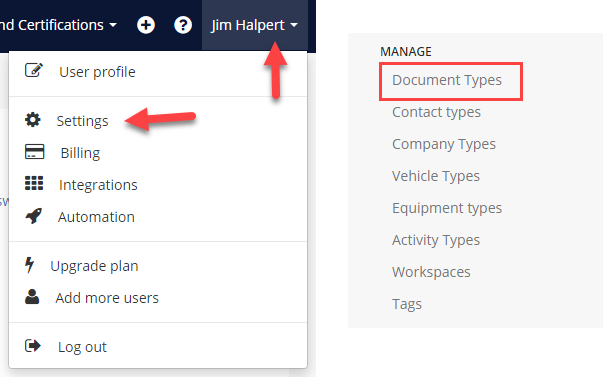
Go to the Document Type list by clicking on your name and selecting Settings.
-
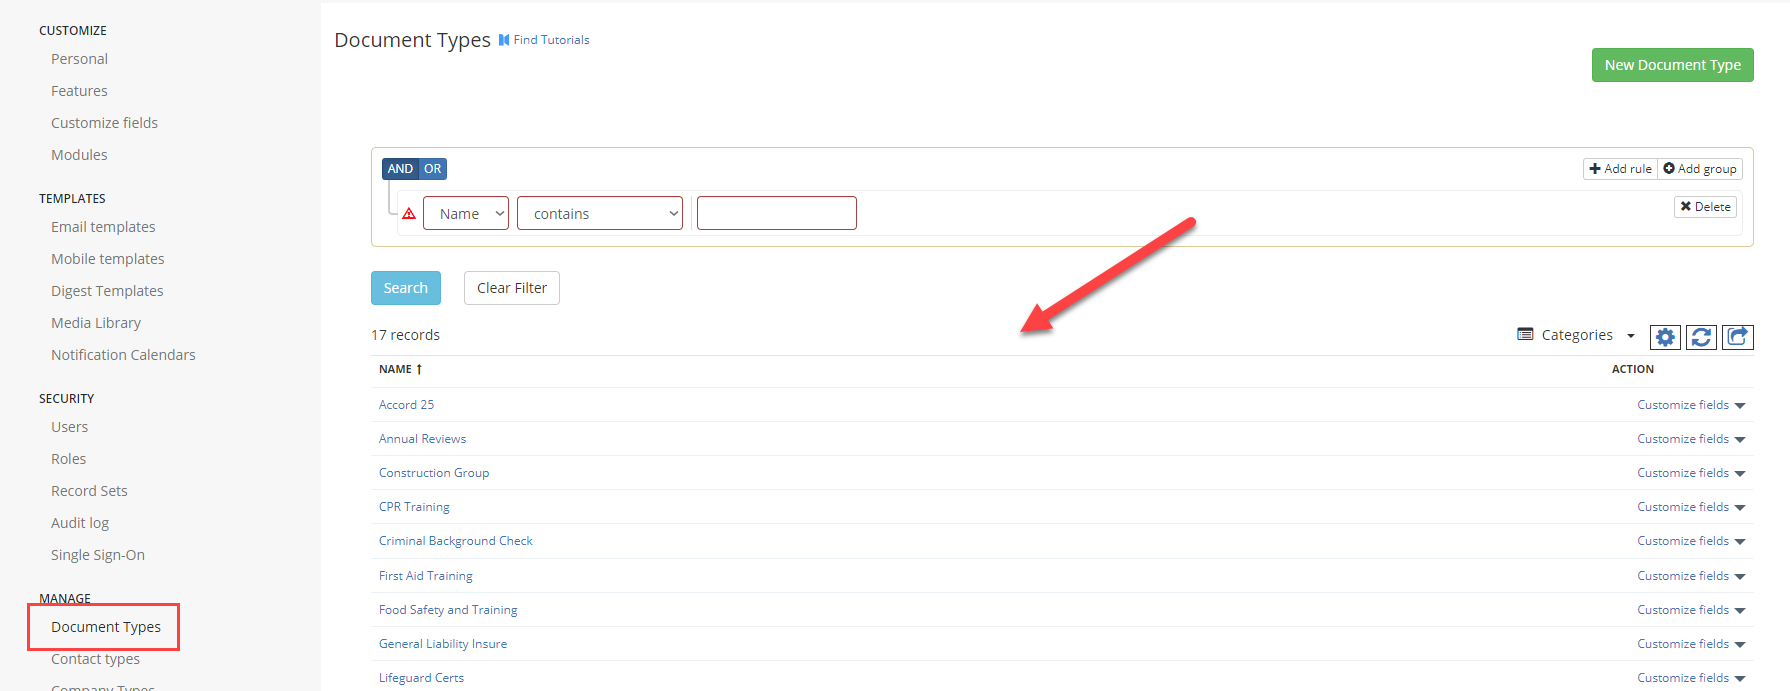
Click on Document Types in the left menu.
-
From the list of document types, select the one you’d like to update.
-
In the settings for the selected Document Type, enable Acknowledgments by selecting Yes. The following settings are available:
-
Enter a question that can be answered with a yes or no.
-
Allow the Contact to change the expiration date.
-
Allow the Contact to view files in the expiration.
-
Allow the Contact to add files.
-
Require the Contact to upload a file – This prevents submission unless a new file is added.
-
Require login – This requires the Contact to log in to Expiration Reminder. Note that Contacts do not have login access unless explicitly added as Users by you or your team.
-


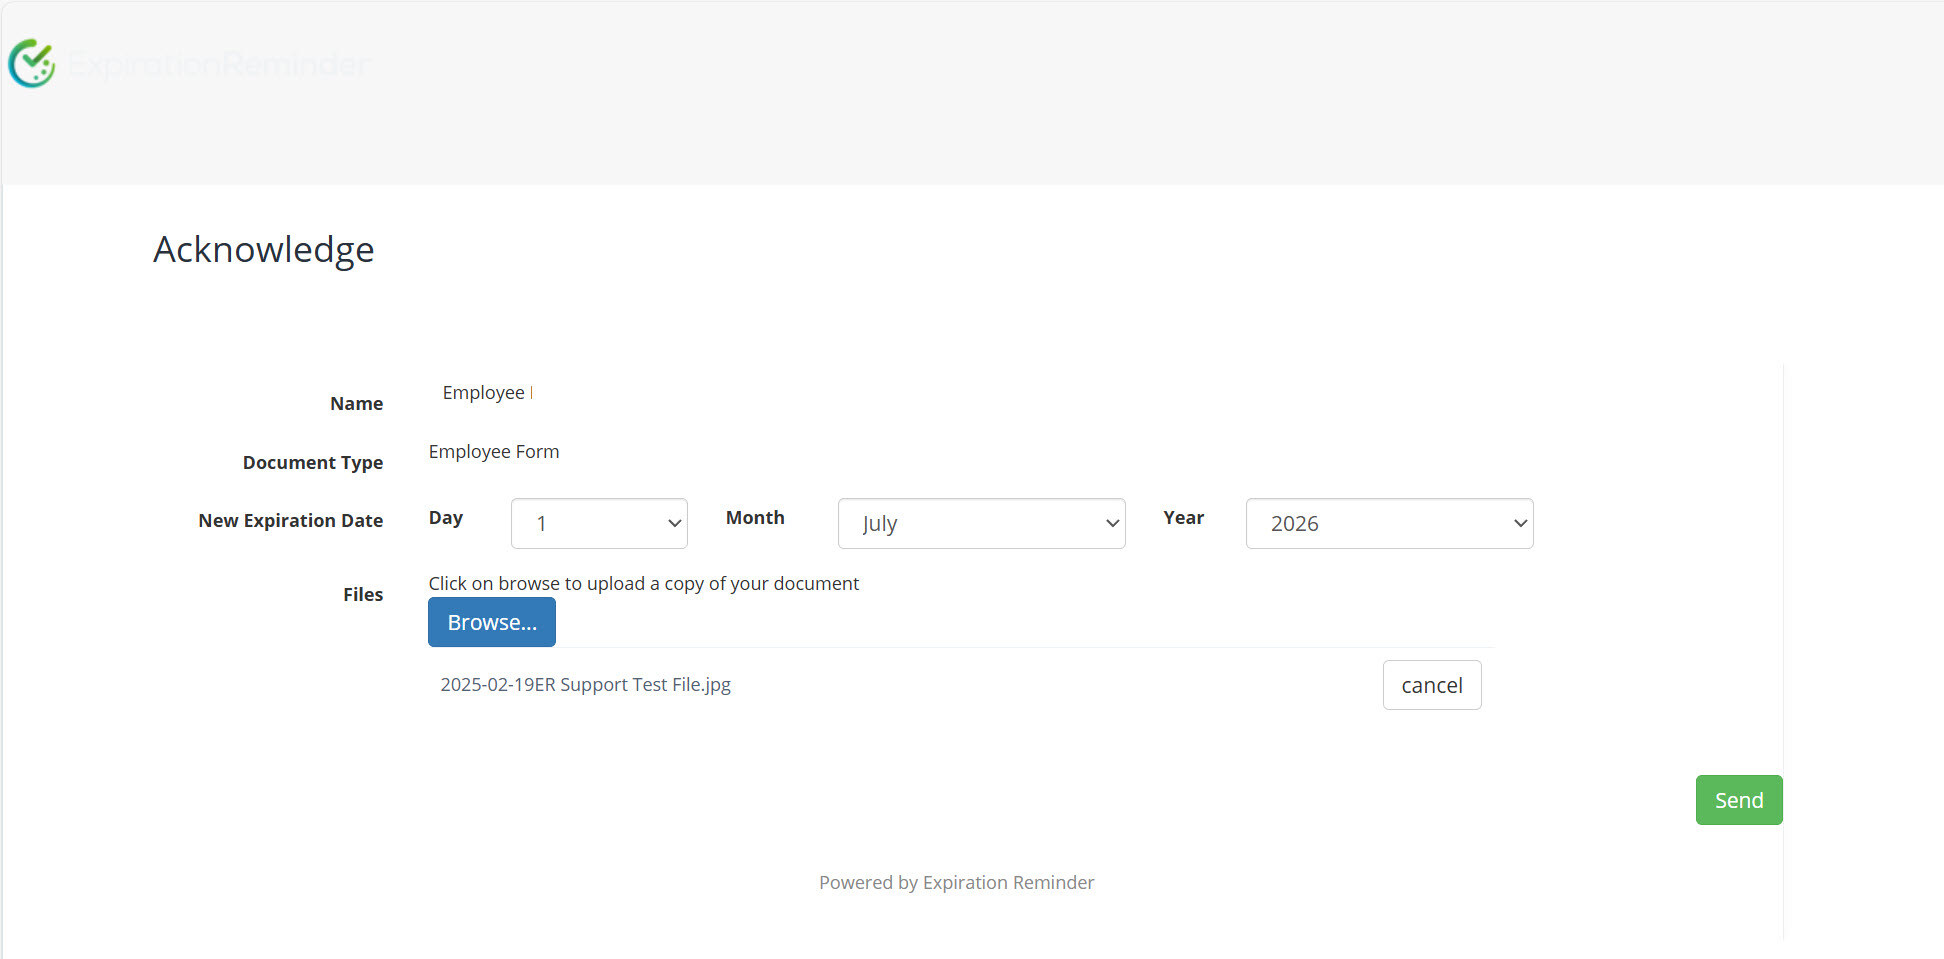
Viewing an Acknowledgment as Recipient
Below is an example screenshot of how the Acknowledgment URL appears in a notification sent to a Contact. When the Contact clicks the link, they will be directed to a page where they can update expiration details or upload files.

Below is an example screenshot of what the Contact may see when accessing the Acknowledgment URL.