Policies
Find out how and when to create policies for compliance in your Expiration Reminder account
The "Policies" feature allows you to set-up a policy for which an employee, a vendor or contact needs to review and accept upon reviewing.
A few examples of Policies could be
-
an Employee Code of Conduct
-
Equipment Safety Policies & Procedures
-
Company Confidentiality/Privacy Policies
-
Insurance & Health Plan revisions
Creating a Policy
To create a policy, click on "Compliance" on the top menu, and select "Policies".
You'll find here a list of your Policies, and you can create a new one with the green "New Policy" button. In the new screen, enter the following information.

-
Name: the policy name.
-
Owner: who is the policy owner.
-
Content: the policy content. This is a rich text field that allows formatting.
-
Files: should there be any files you'd like the employee to have/review. You may choose to include a downloadable format of the policy here.
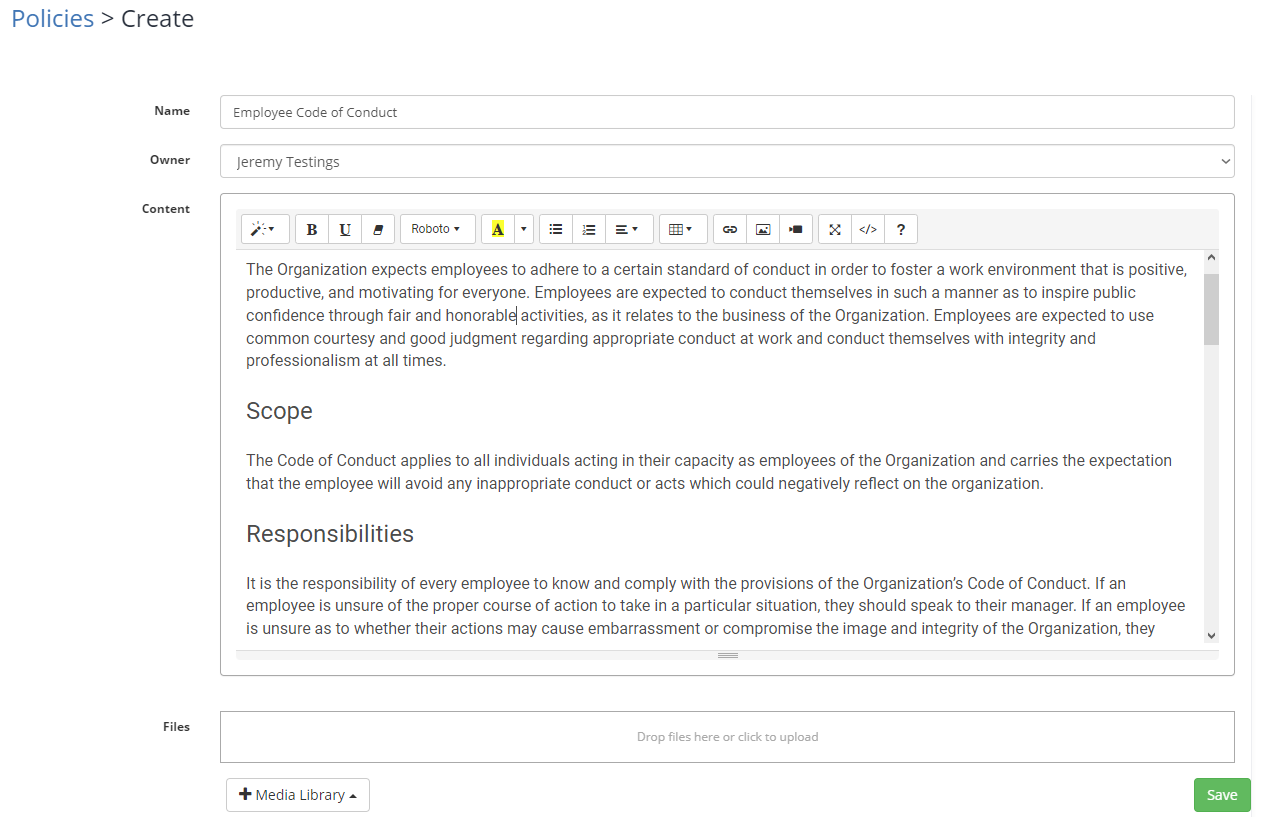
Once the required information is input, you may click Save.
Sending a Policy
When creating a new Policy, you'll immediately be taken to the page where you can send the policy via Policy Acknowledgements. You can also edit acknowledgments of a previous Policy by clicking the "Configure" link, at the Policies page.

If we want to send out our Policy, we can use the "New Acknowledgement" button, in the Policy Acknowledgements section.
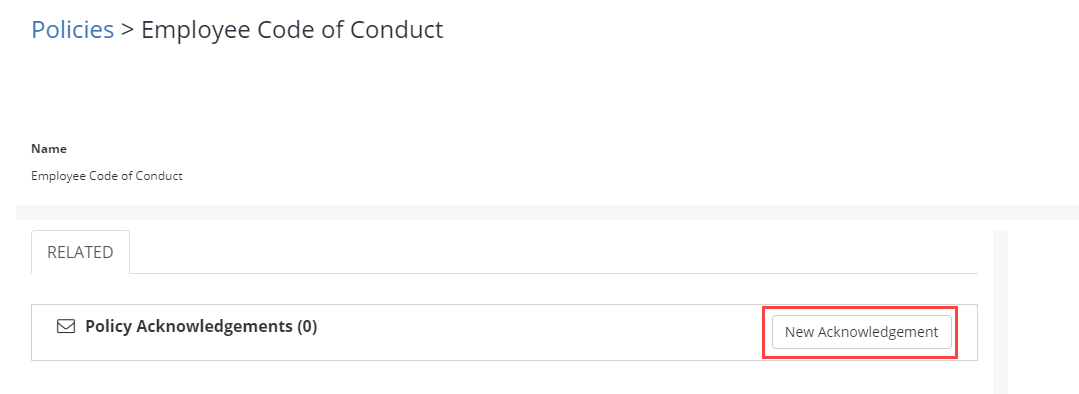
On the next screen, you'll be prompted to enter some of the following information to make-up the recipients of the policy.
-
Name: the policy acknowledgement name (ex. Initial Acknowledgement, Amended Acknowledgment, etc)
-
Audience: the audience to send the notifications. Audiences are composed of Contacts. You can learn about creating Audiences here: What are Audiences | Expiration Reminder Help Center
-
Valid from: enter the date for which the acknowledgement is valid.
-
Valid to: enter the date for which the acknowledgement is valid to.
-
Number of days to respond: days the contacts have to respond. After this number of days, the acknowledgement will stop working.
-
Send alerts every: indicate how often to send the alerts.
-
End after: enter how many alerts to sent.
-
Allow Deny: indicate if the contact is allowed to reject the policy.
-
Allow Exception: indicate if the contact is allowed to request an exception.
-
Delivery Type: indicate which method to use to send the alerts. It can be email, mobile text message or both.
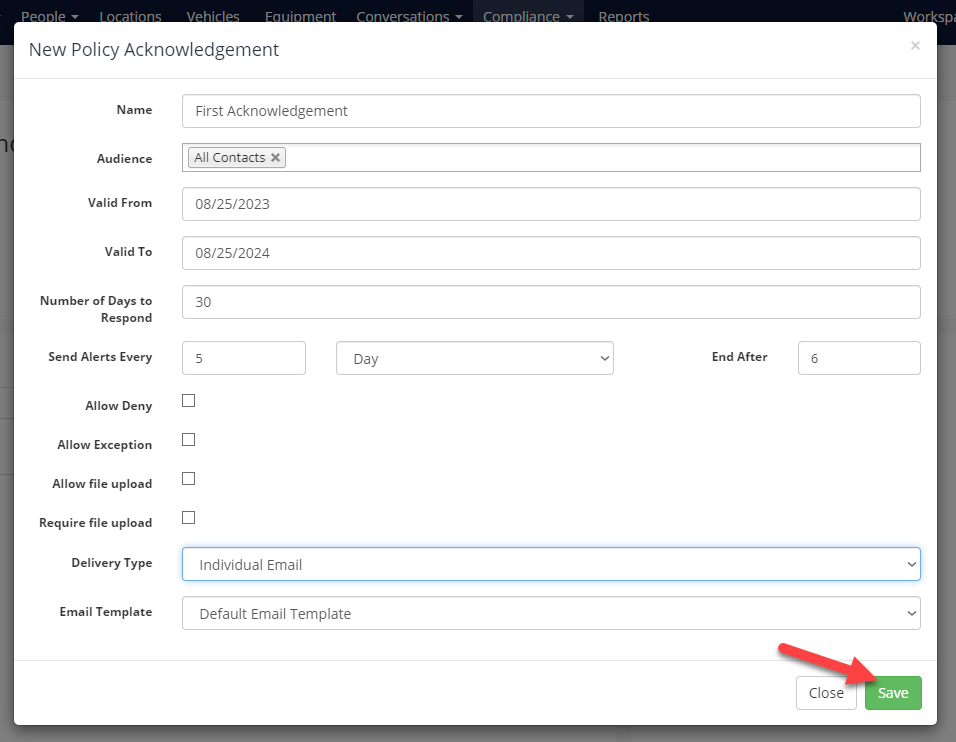
Pictured above, we have chosen to use "All Contacts" as our Audience because the Code of Conduct applies to all employees. We've also included that it is valid for a year, after a year, we can choose to send a second acknowledgment with an amended policy.
Policy Response Dashboard
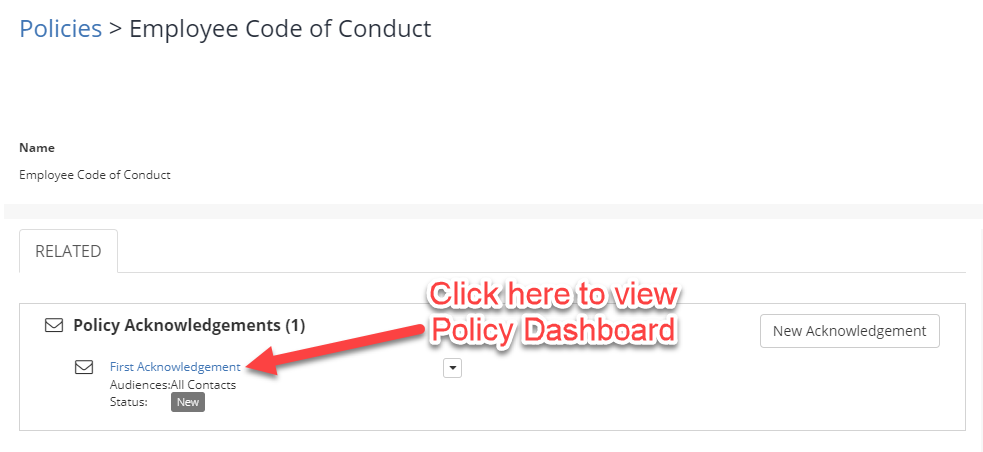
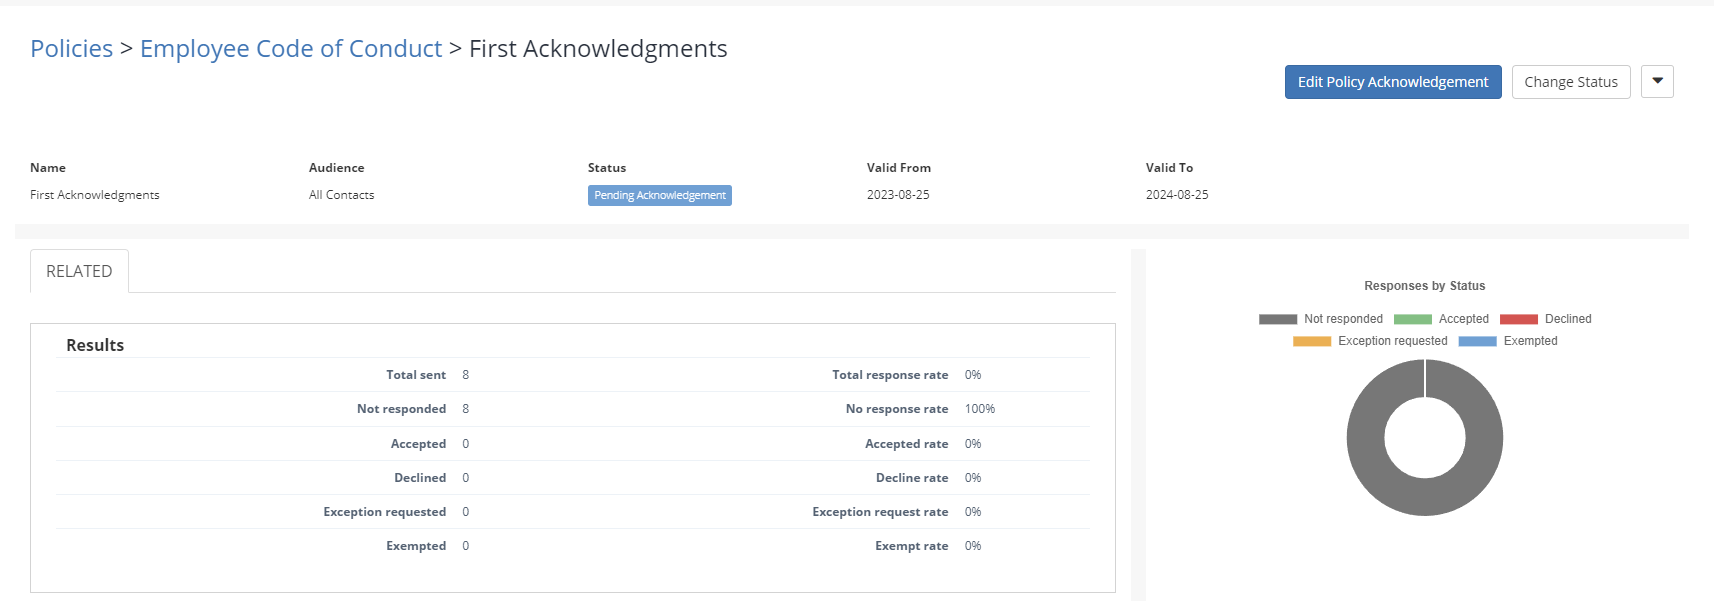
Once a policy has been sent, you will have access to your Policy Dashboard (screenshots below) - here you are able to view the responses as well as rate of responses for your policy.
Approving Policy Requests
If a policy acknowledgement was setup to allow exceptions or files, the contact receiving the alert will be able to add these in their acknowledgments of the policy. When doing this, they can enter a comment on why they'd like the exception.
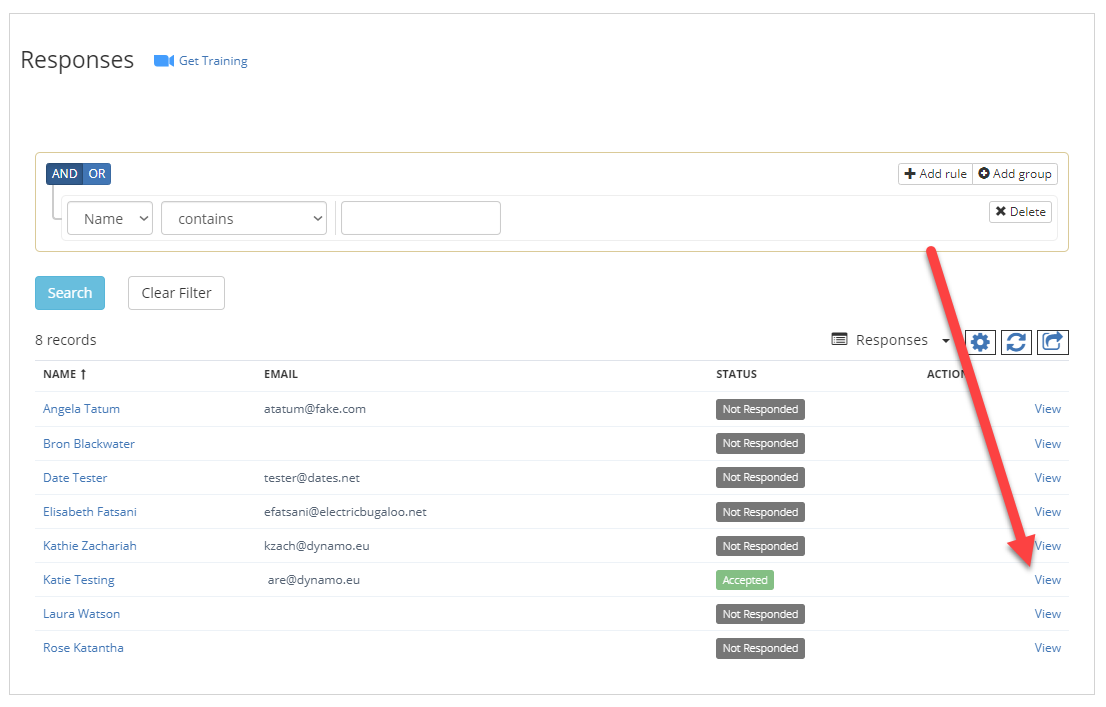
To view the comments, exceptions and/or uploads, you can click the "View" link on the far-right, under the "Action" column. We have provided some examples below of what a Policy Response may look like.

