Organizing Custom Fields with Tabs
Discover how to arrange custom fields into various tabs according to the Document Type within the new/edit expiration screen
When configuring multiple fields, you might need to group them in different tabs on the expiration item screen. This prevents having a long list of fields on the default Custom Fields tab.
Please note that Tabs will not apply to expiration items created with Document Type Groups.
By default, when editing an Expiration Item, all fields will show in list together so that all fields may be edited in one place (pictured below).
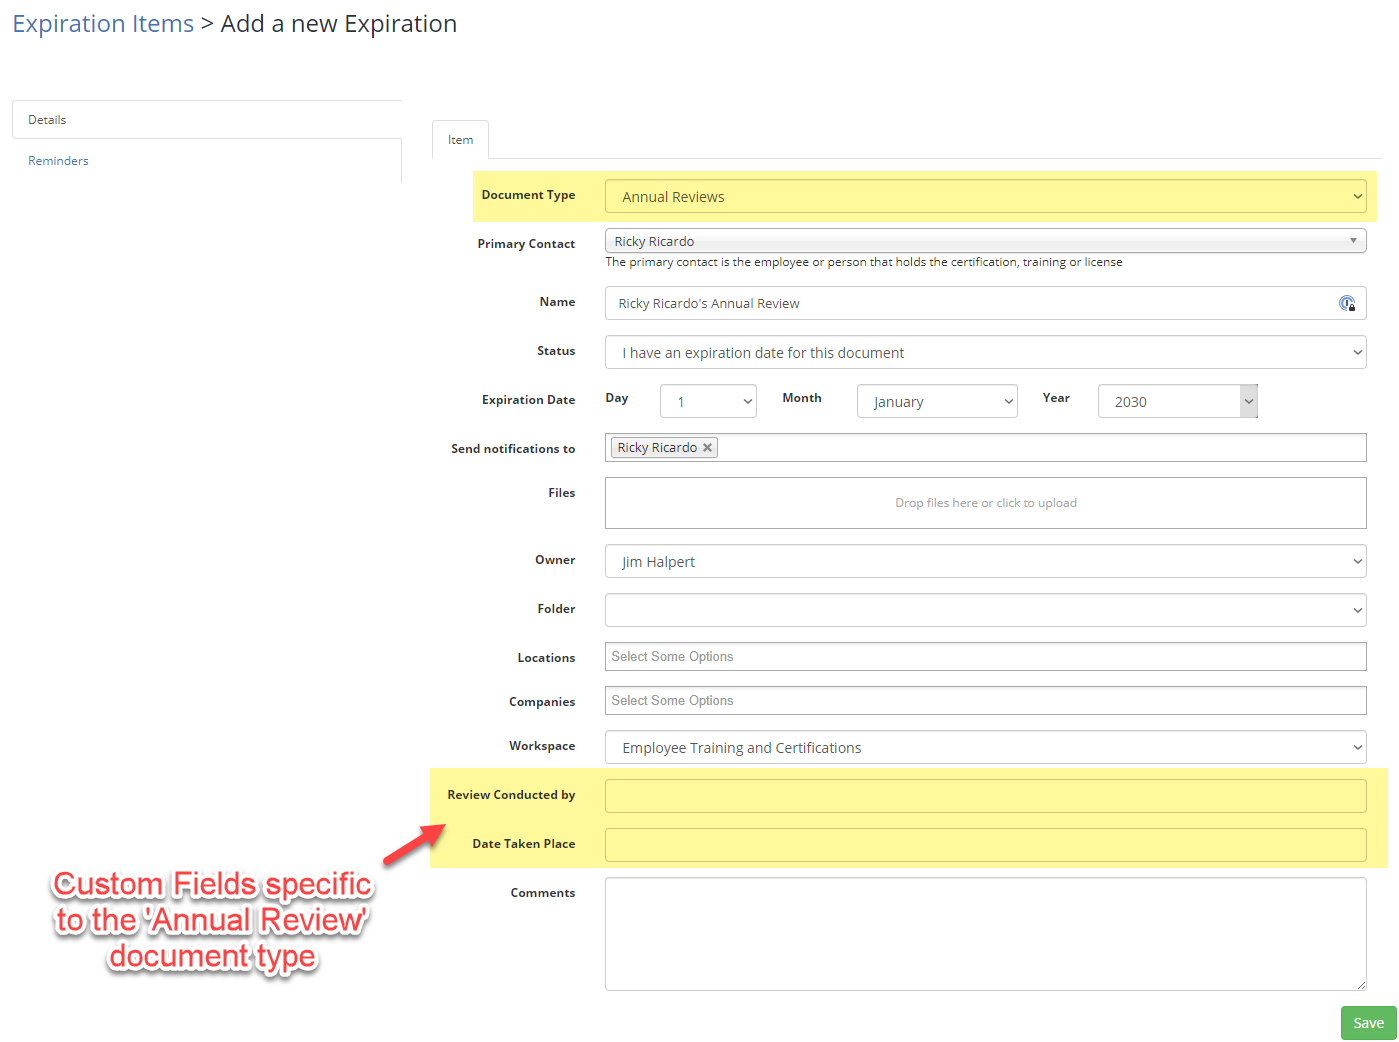
But if you have a long list of document type-specific fields, it may be easier to group them by Tabs for organizing many fields.
Adding a tab
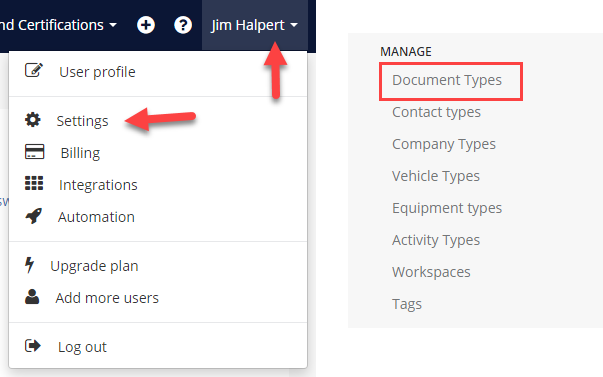
To add a tab go to the document type list by clicking on Your Name in the top-right corner and then on Settings from the drop-down menu.
Find the 'Manage' heading on the left-hand side, and click "Document Types".
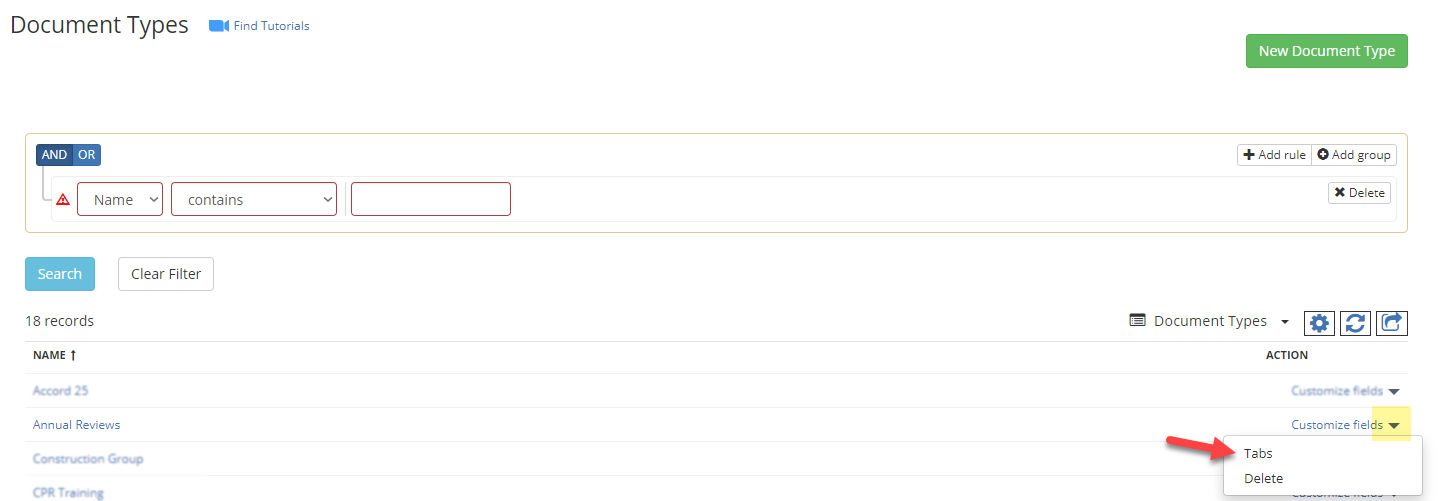
Once at your list of document types, you can select the Arrow under the "Action" column, and select "Tabs" for your document type.
The click on Add a new Tab. In the new screen, just enter the tab name and then click Save.


Assigning Custom Fields to a Tab
To assign a tab to a custom field, go the Document Type list and click on Custom Fields.
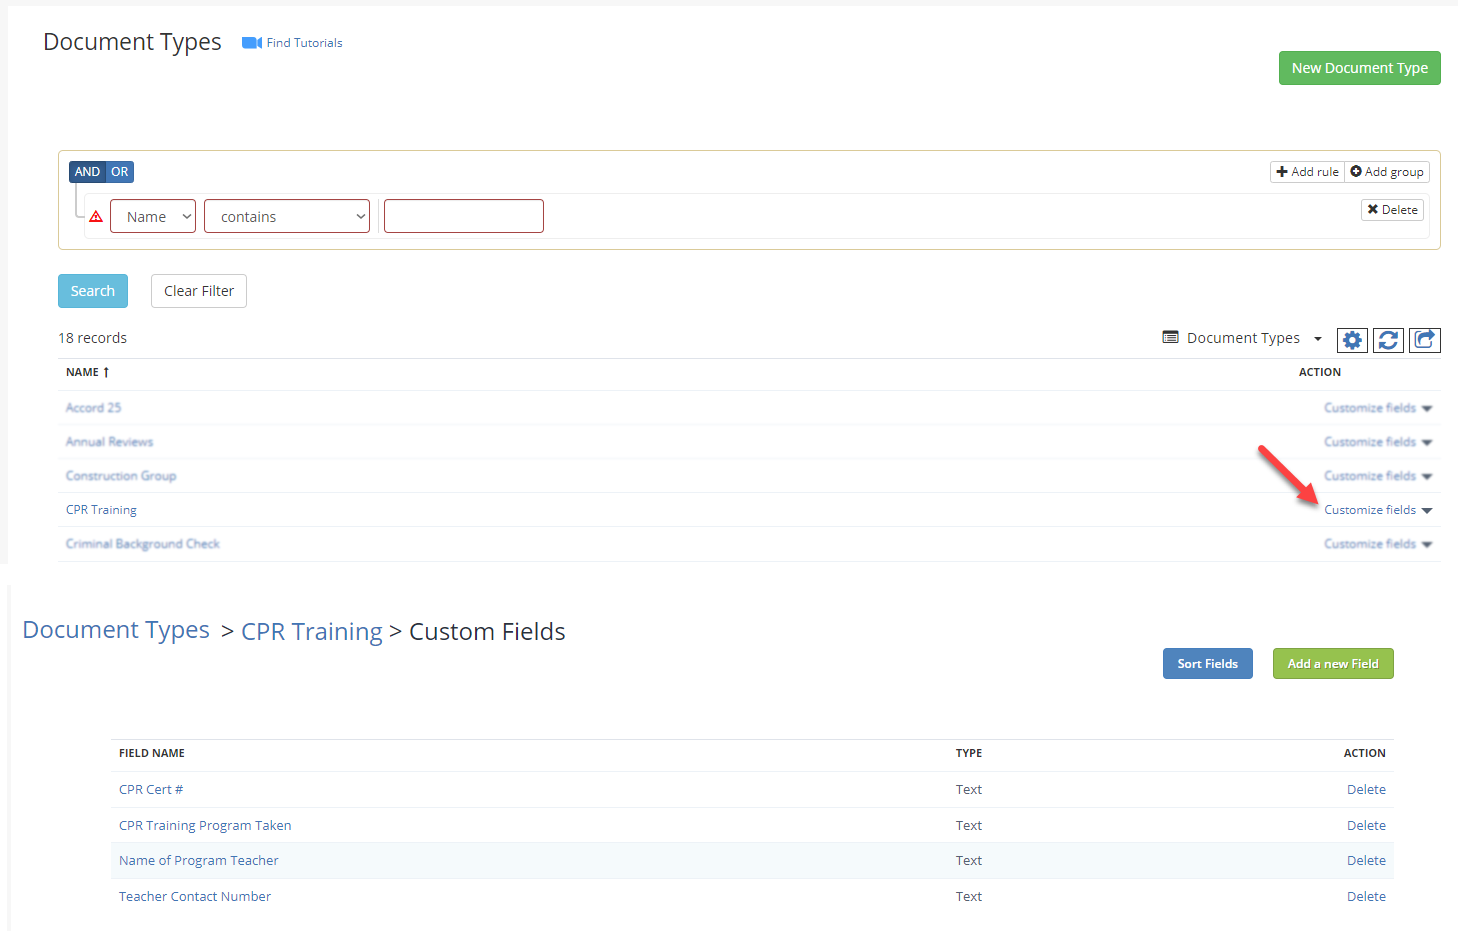
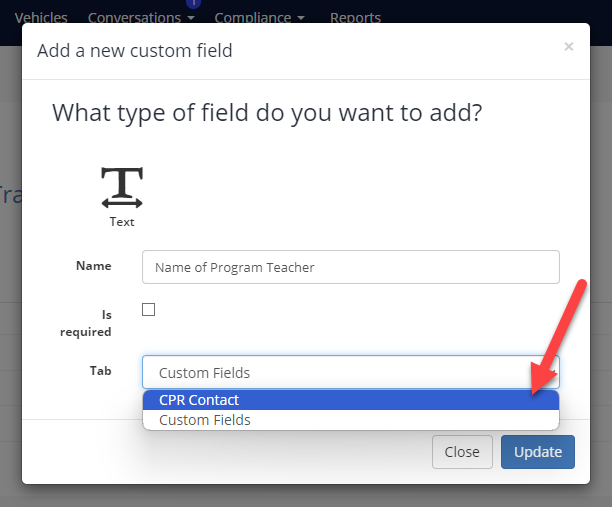
From the custom fields list, select the custom field you'd like to change tabs and from the Tabs field select the new tab from the drop-down menu:
Editing/Creating New Expirations
Tabs are not supported in the "quick-add" expiration screens.
You will only be able to edit or add items to fields within Tabs from the traditional method of adding Expirations via your Expiration List view (pictured below).


