
What's on your dashboard
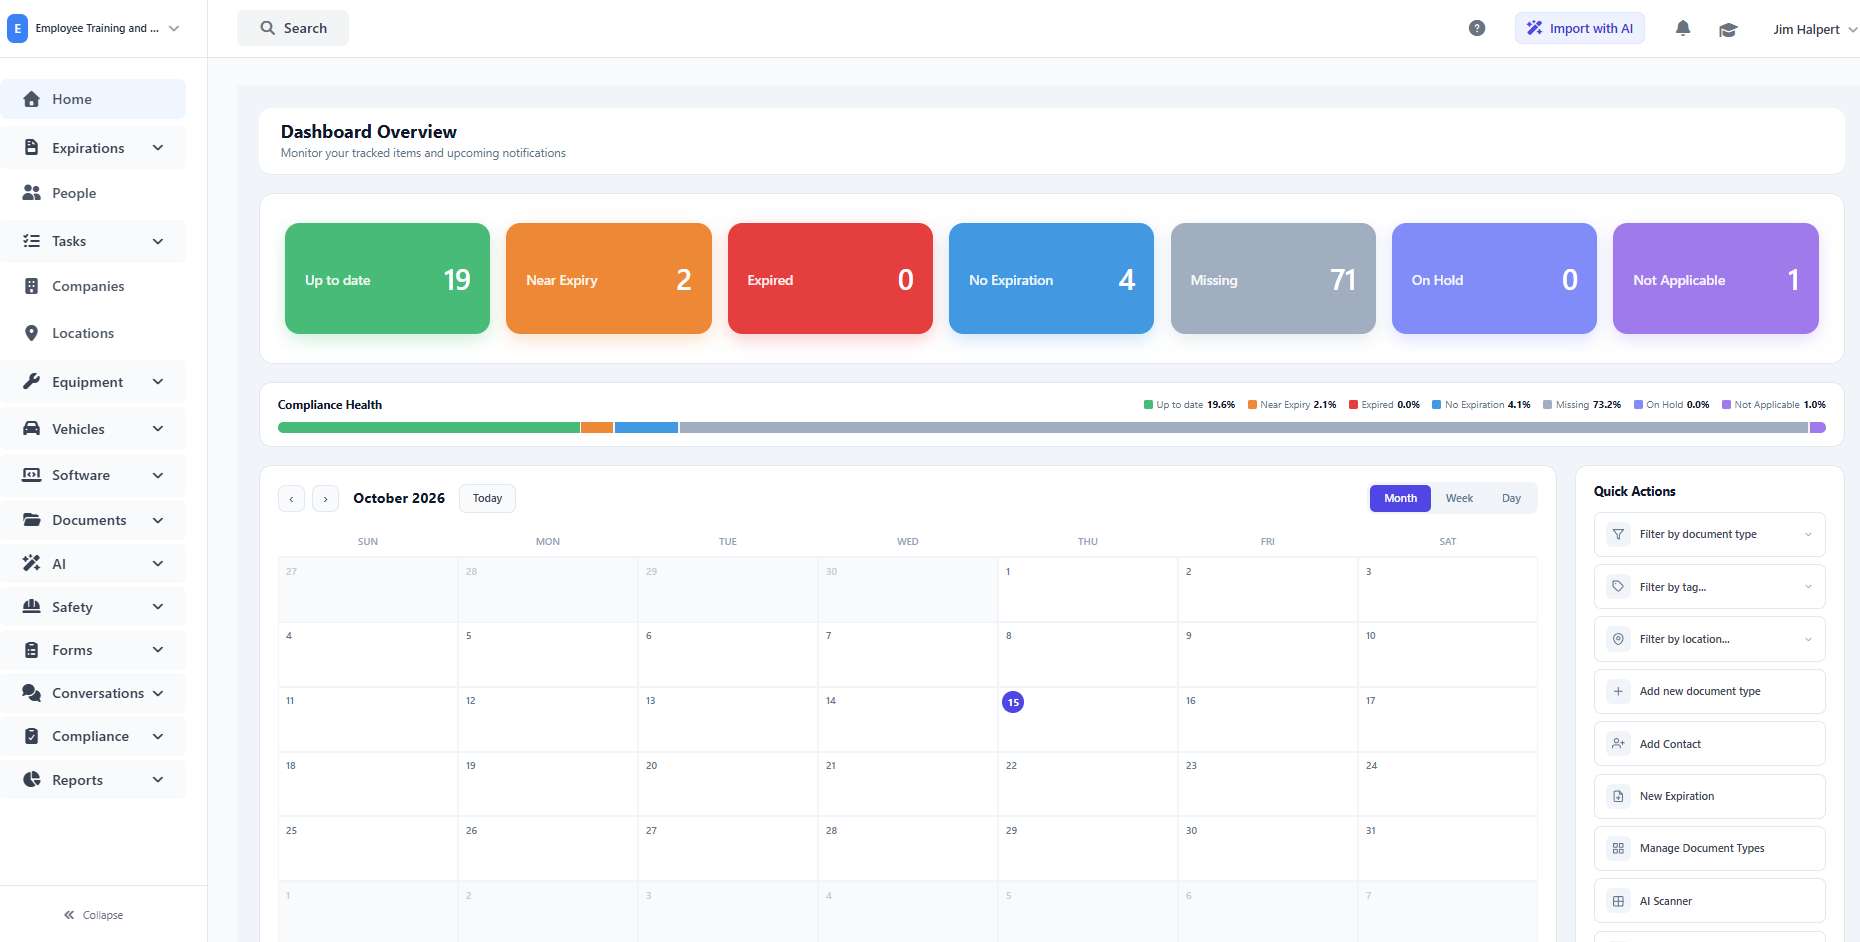
The dashboard has four main sections:
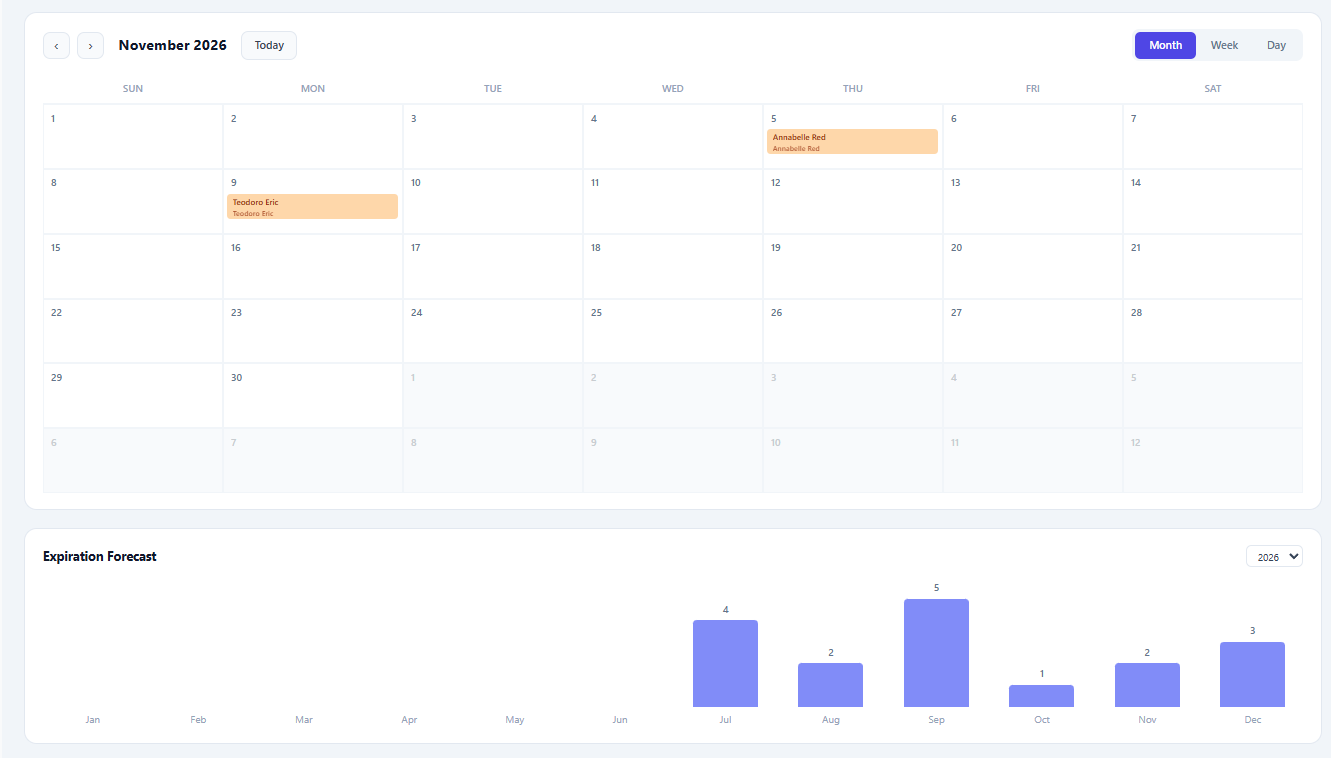
- Calendar & Expiration Forecast: Calendar shows your expirations in a calendar view, so you can see what's coming up this month. Forecast shows the year's expirations at a glance, so you can plan ahead.
- Expiration Status Filter: Groups your items by status, such as Expired or Near Expiry. Select a status to see only those items.
- Quick Actions: Access commonly used actions directly from the dashboard without needing to navigate to other pages.
- Menu: Use the menu on the left-hand side to access your lists and compliance features, making it easy to manage and monitor the information in your account.
Expiration Status Filter
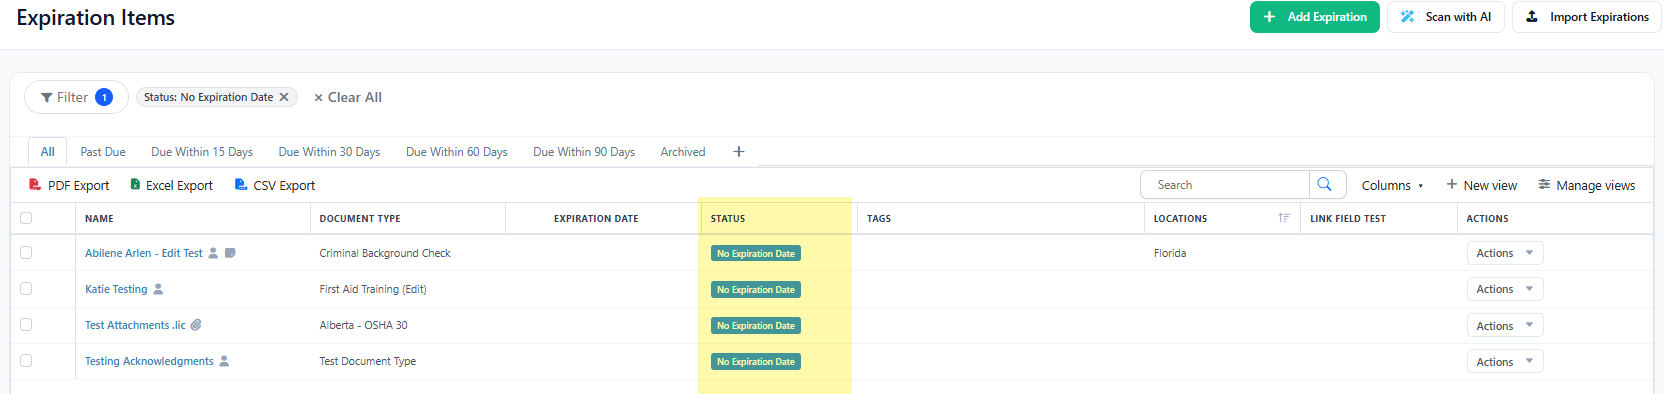
Use the Expiration Statuses on your dashboard to jump straight to a list of items with a particular status.

An expiration list opens showing only the items with that status. For example, if you select No Expiration and four items have no expiration date set, the list shows those four items.
What each status means
|
Status |
What it means |
|---|---|
|
Up to Date |
The expiration date is in the future and outside the near-expiry warning period. |
|
Near Expiry |
The expiration date falls within the warning period. |
|
Expired |
The expiration date has passed. |
|
No Expiration |
No expiration date has been set for the item. |
|
Missing |
Required expiration information is missing. |
|
On Hold |
The item isn't being monitored right now for an external reason, such as an employee being on leave. |
|
Not Applicable |
None of the other statuses apply. |