If you need to add multiple companies to your Expiration Reminder account quickly, you can use the Import Tool.
Before You Begin:
- Ensure Correct Workspace: Make sure you’re in the correct workspace before starting your import. Data imports to the workspace you're currently in.
- Single Sheet Import: The import feature will only read the first sheet of your Excel file. For multiple sheets, import them individually or create separate files with one sheet each.
- Custom Fields: If you're using Custom Fields for additional data, ensure these fields are already created in your account before importing. You can learn more about adding custom fields here: Adding Custom Fields | Expiration Reminder

Step 1 - Access the Import Tool:
-
- Go to your Account Settings and find "Tools" on the left-hand side.
- Click 'Import Data', and you'll be taken to the Import Tool.
Step 2 - Select your Import Type:

- On the Import Tool page, you'll see a section labeled "What are you importing?"
- Click the "Start Import" button under Companies to begin.
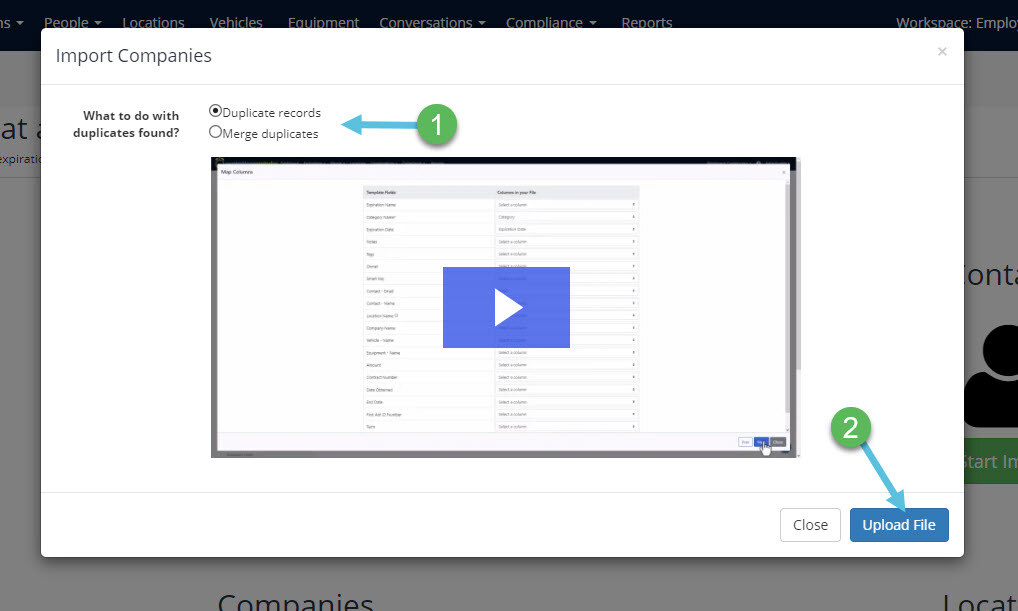
Step 3 - Handle Duplicates and Select Spreadsheet:

- You’ll be prompted to choose how you want to handle duplicates.
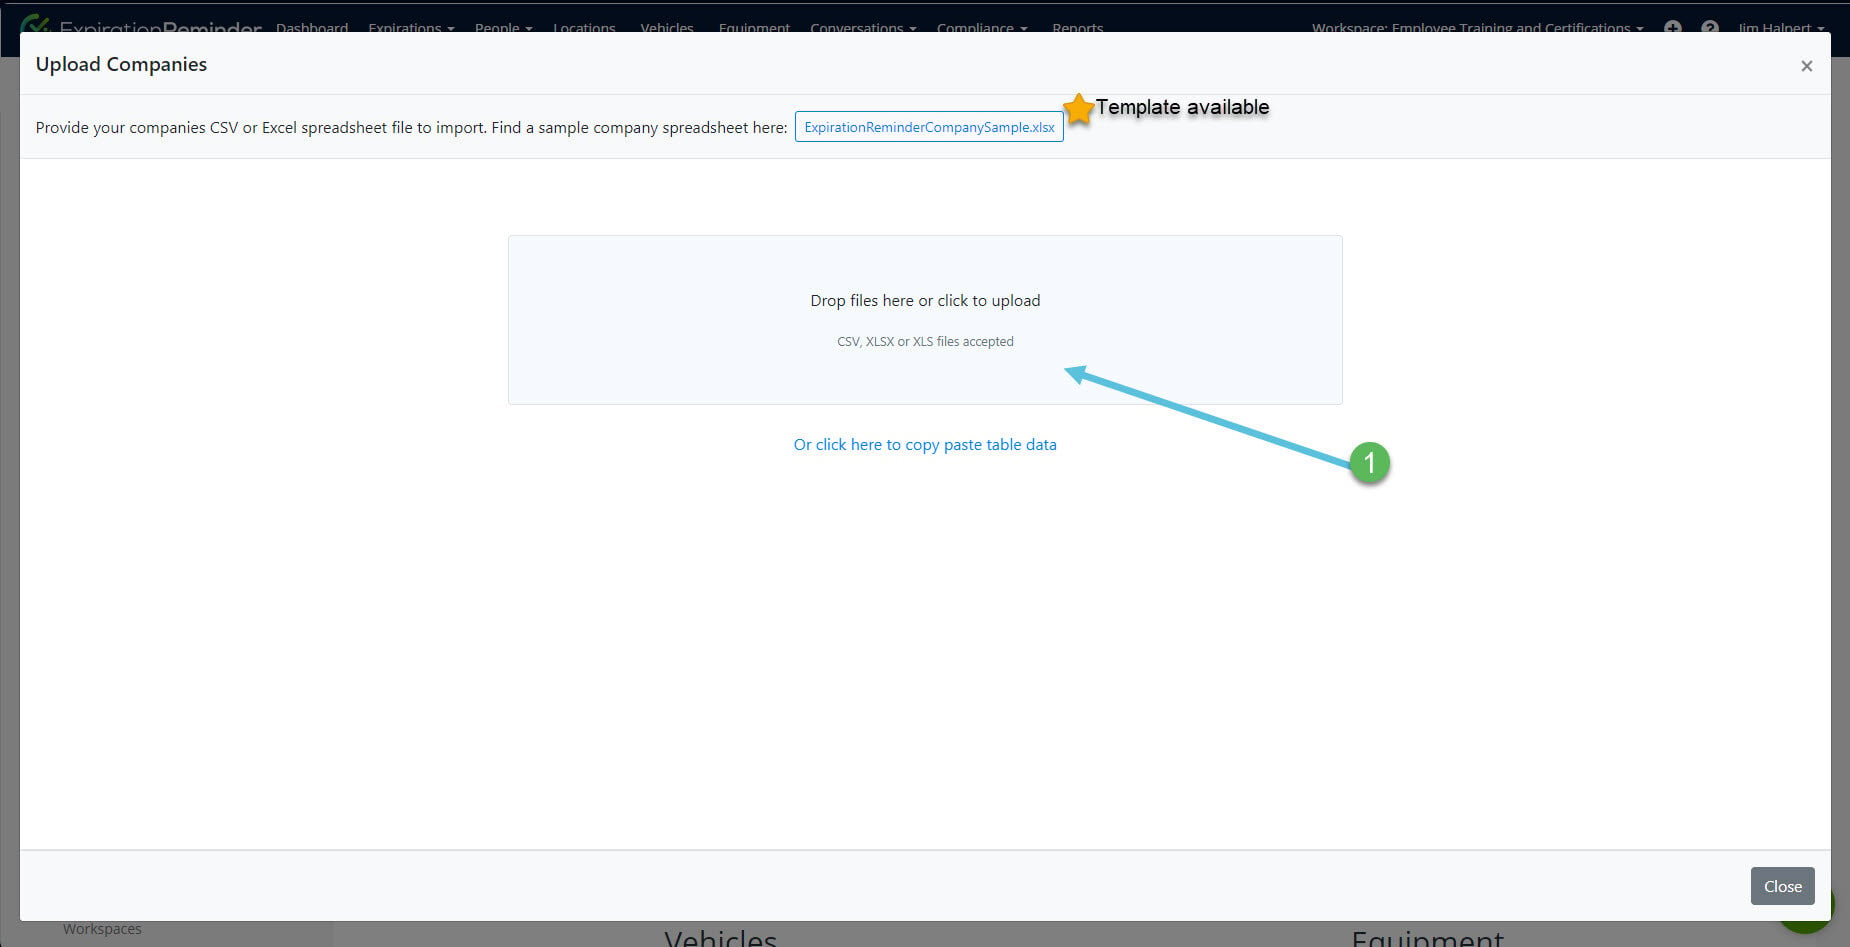
- After making your selection, click "Upload File" to either select or drag your file from your computer.
- If you need a template, you can download an example spreadsheet on this screen (shown below).

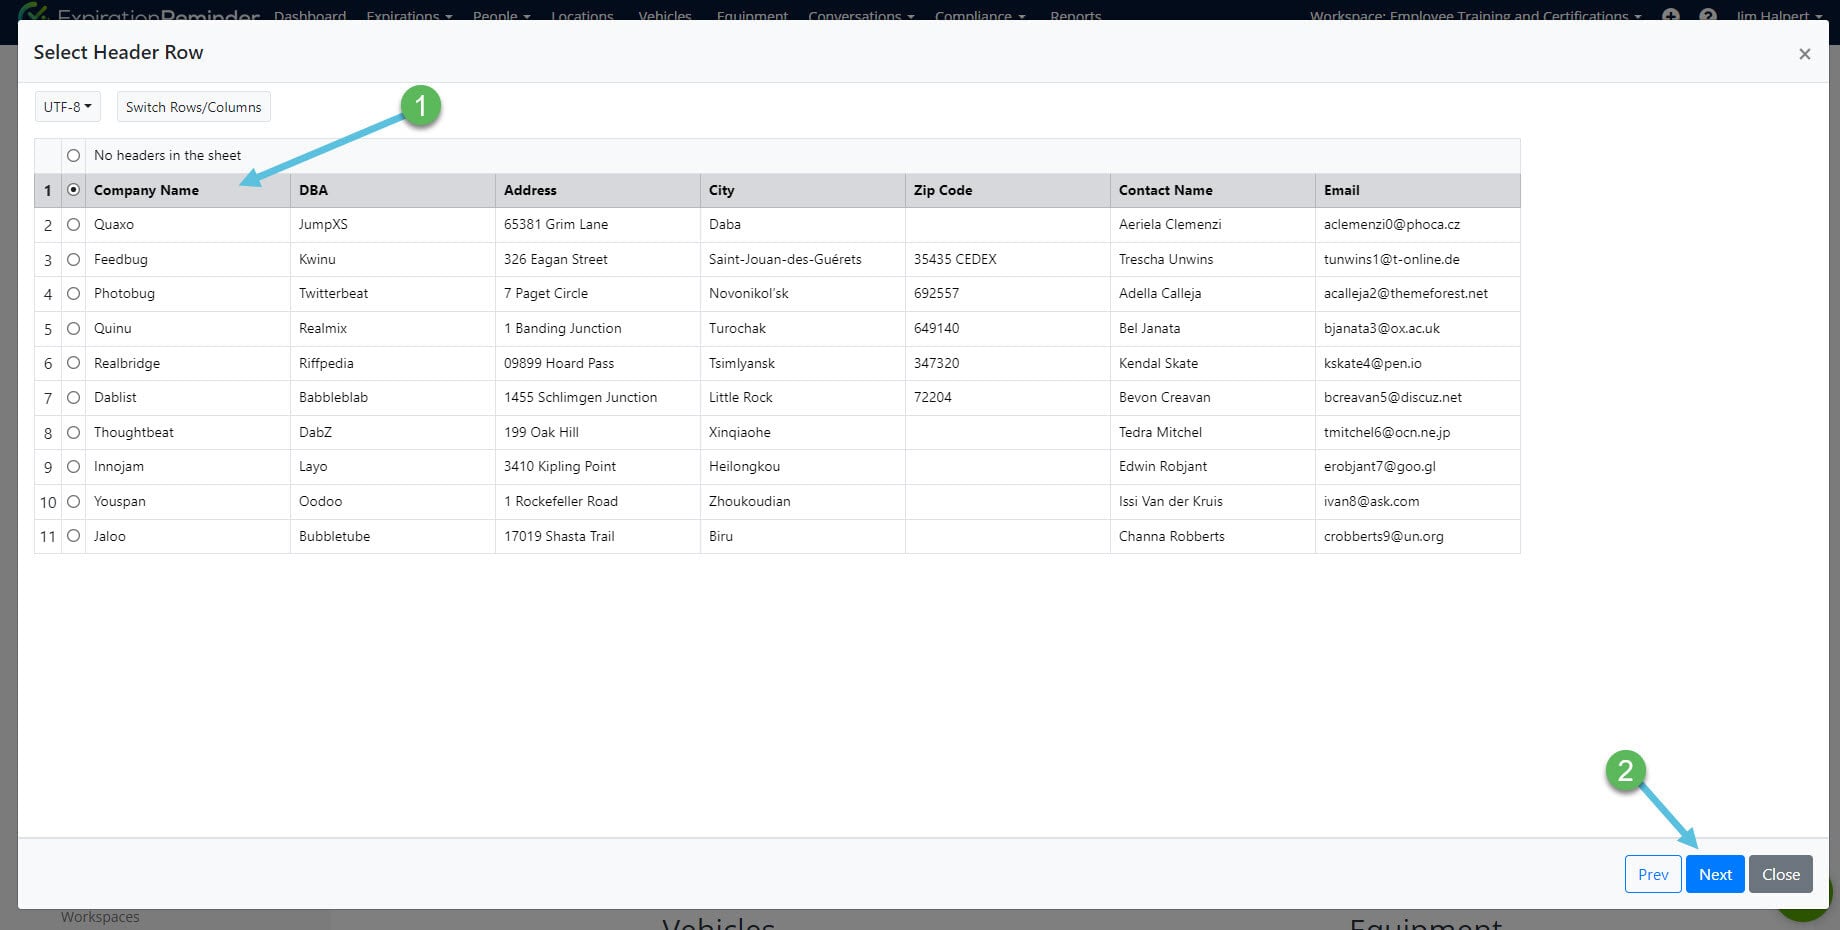
Step 4 - Select the Heading Row:
- Once your spreadsheet is uploaded, the Import Tool will display it. Below is an example of the spreadsheet we are using for this tutorial.

- You'll need to select the heading row of your spreadsheet and then click "Next."

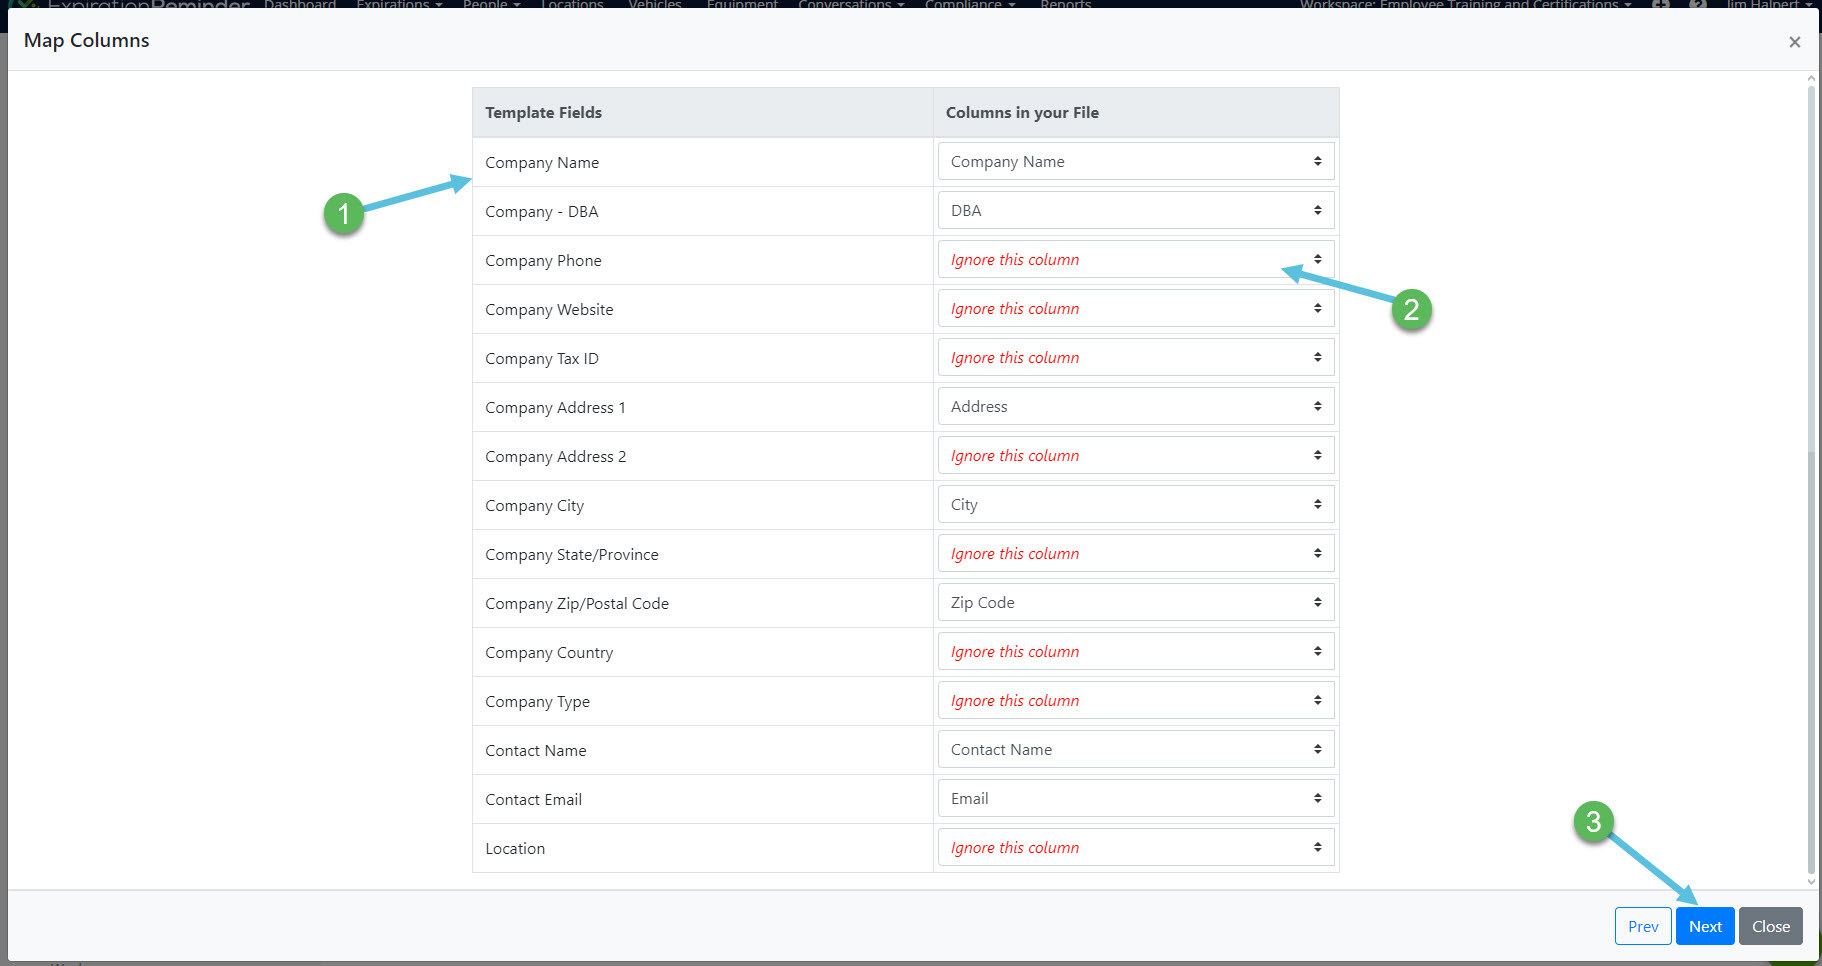
Step 5 - Map the Columns:
- On the Mapping Columns screen, you'll match the columns from your spreadsheet to the corresponding fields in your account.
- Not all columns need to be mapped. If you don’t want to include certain columns, choose "Ignore this column" from the dropdown menu.
- When you’re satisfied with your mappings, click "Next."

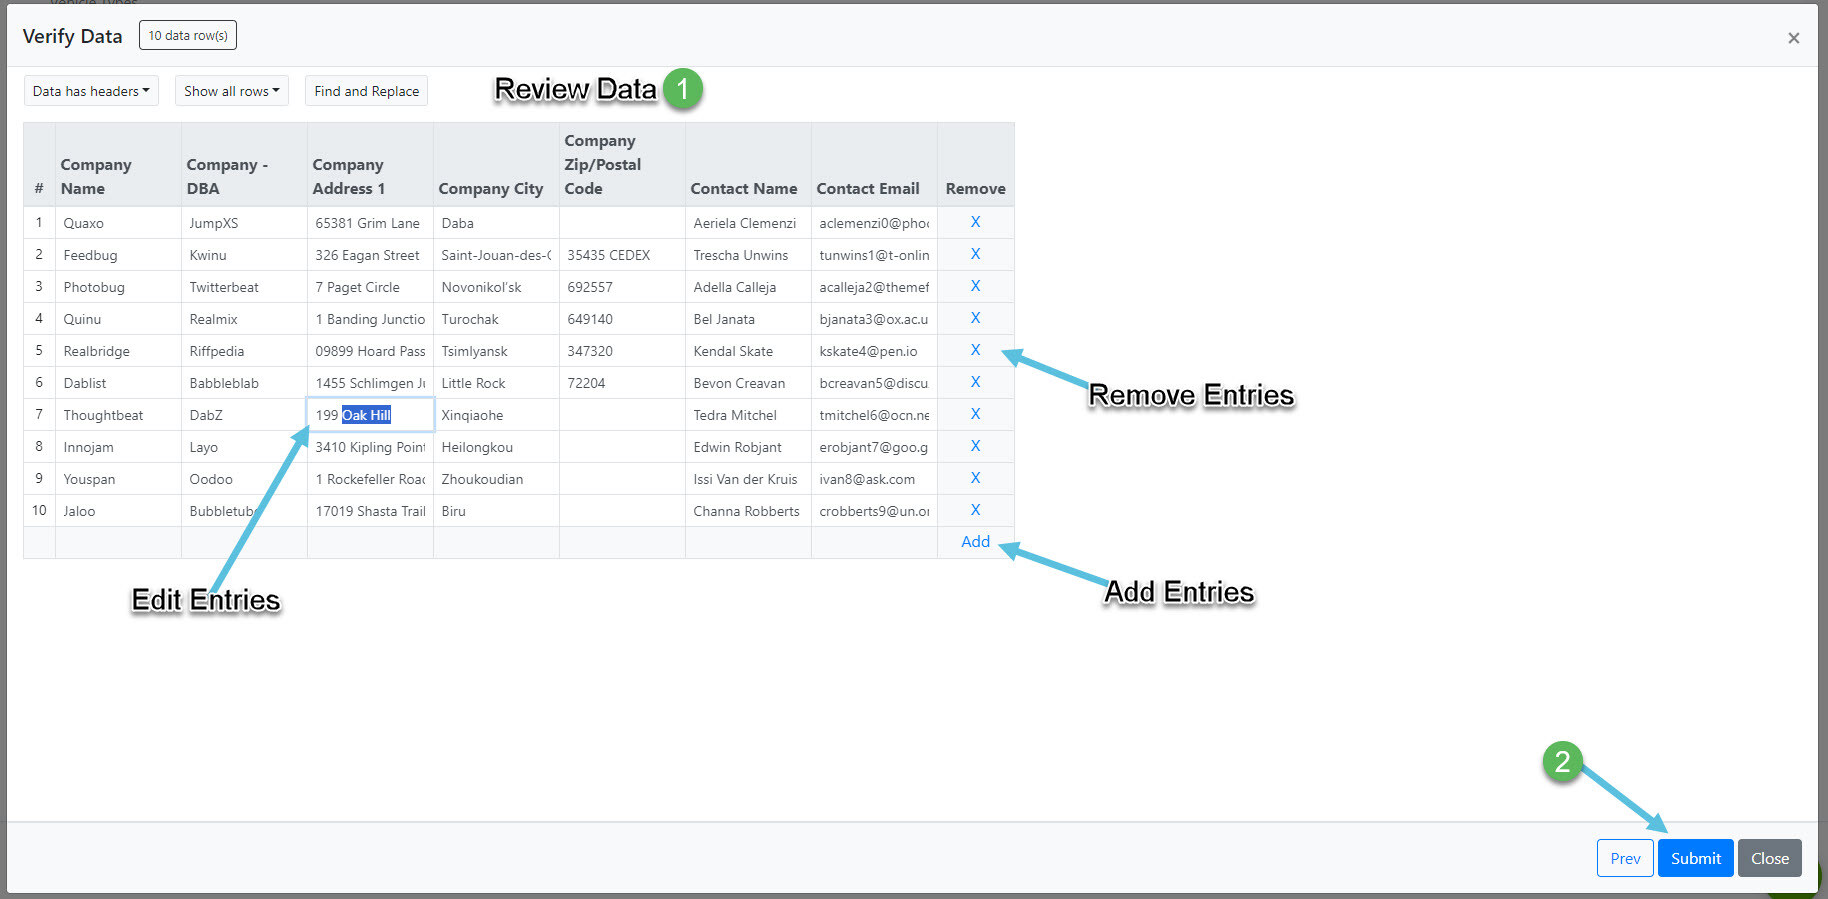
Step 6 - Review Your Import:
- This is your final chance to review the data before importing.
- You can make quick edits or remove specific rows/entries.
- Click "Submit" to start the import.

Step 7 - Import Completion:
- Once the import is done, you’ll see a confirmation screen and receive an email notification.
Step 8 - Review the Data:
- After the import is complete, it’s important to review the data in your account to ensure everything was imported correctly.