Escalation Rules
Learn when it's appropriate to employ escalation rules to effectively notify contacts associated with your account
Escalation rules are used when you need to send notifications to contacts that aren't part of the regular reminder frequency of an expiration, document, certification, license, etc. For these notifications, maybe you'd like a different frequency of reminders (maybe less or maybe more).
Examples of when you made need to use Escalation Rules are, when you need the system to notify a coordinator, a clerk, a supervisor, a manager, a director, a branch manager, etc. All these are valid scenarios where you'll use escalation rules.
- Adding Escalation Rules
- Sending Notifications to Supervisors
- Examples of Escalation Rules
- When Not to Use Escalation Rules
Adding a New Escalation Rule
Please note if using Workspaces, that Escalation Rules should always be created within their corresponding Workspace.
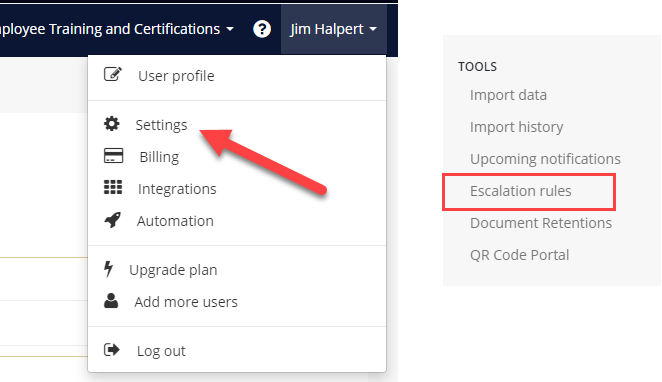
To access the Escalation Rules for your account, you can click your name in the top-right corner to activate your menu, and find Settings. "Escalation Rules" can be found under the heading "Tools" on the left-hand menu.
When on the Escalation Rules screen, you can add a new Rule from the green "New Escalation" button in the top-right corner.

Once you have entered a name (and selected a Workspace, if using workspaces), the Rule will then be available for you to edit and design for the account.

We have provided an example below of one instance of how Escalation Rules may be used.
Sending Notifications to Contacts or Supervisor for a Document Type
First, you need to create the Conditions of which your rule is set and then you can add the Notifications which will be sent from this rule (to whom, and when).
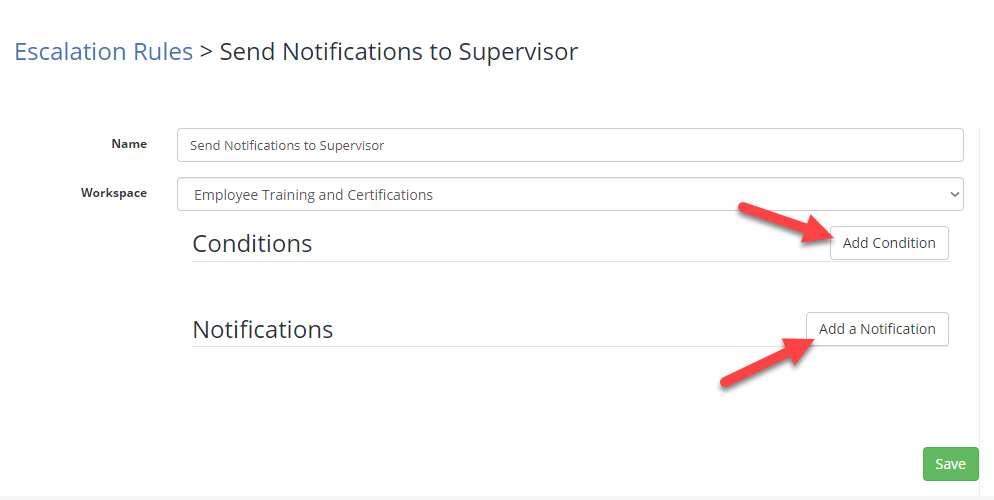
Conditions allows you to define under what circumstances an Escalation Rule gets executed. For this example, you can have the escalation rule to execute for a specific document type (background checks). If you have multiple document types, (or all document types) to monitor, you can add a rule for each type.
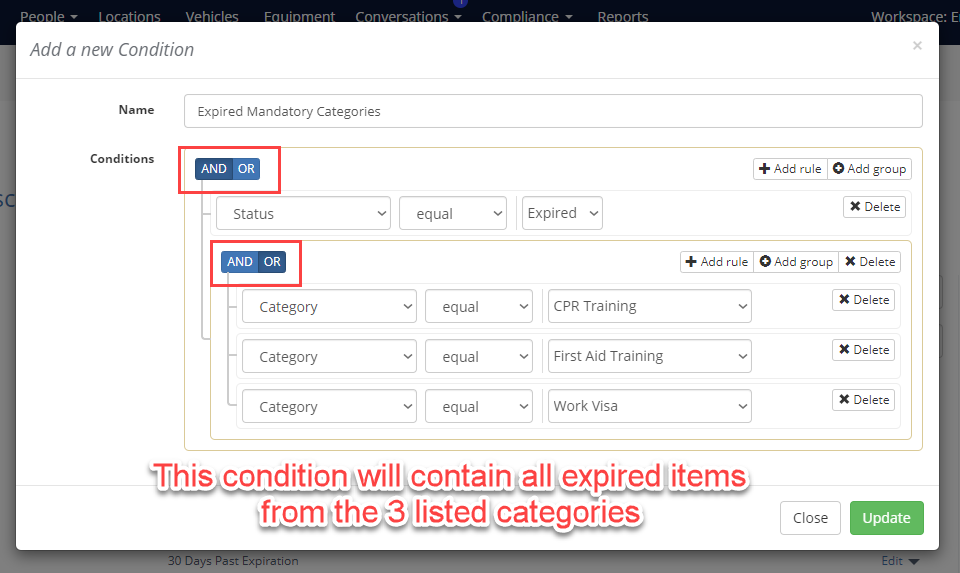
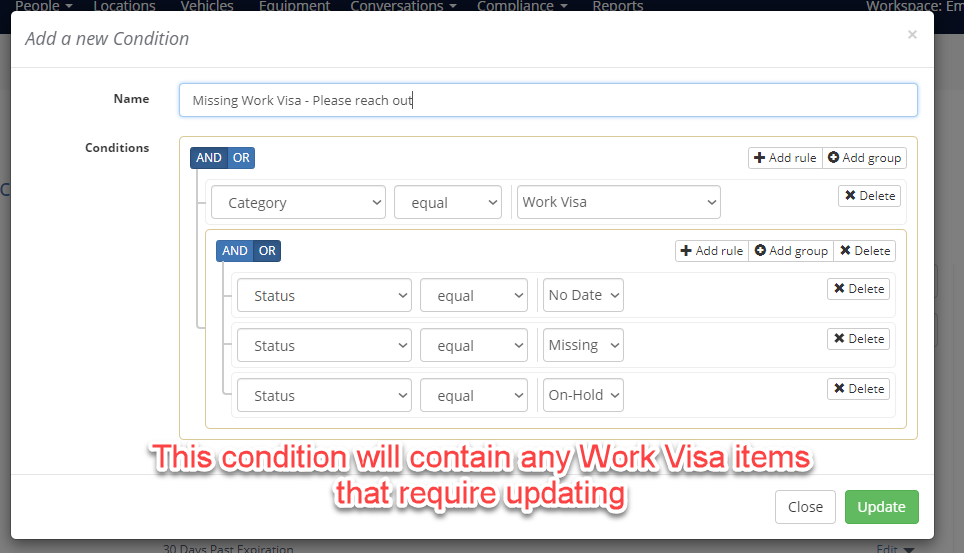
Ensure when adding multiple rules to adjust the "And"/"Or" of the rule based on your requirements. We have listed some examples at the end of this article.
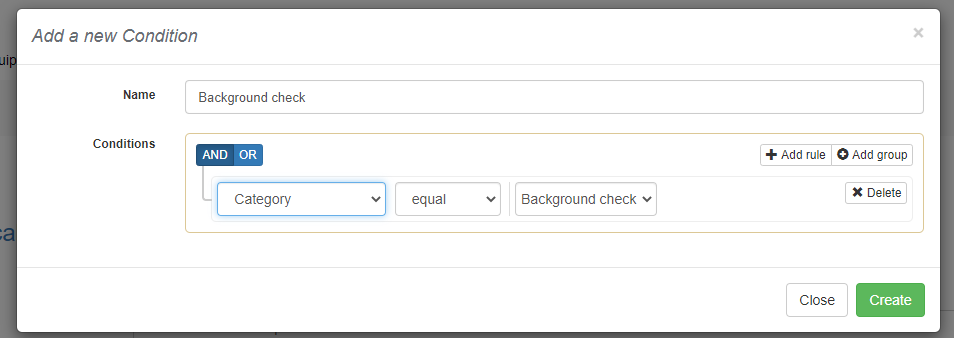
The Notifications allows you configure how many notifications to send and when. In our example, we are choosing to send the Background Checks to the Contact's Supervisor.
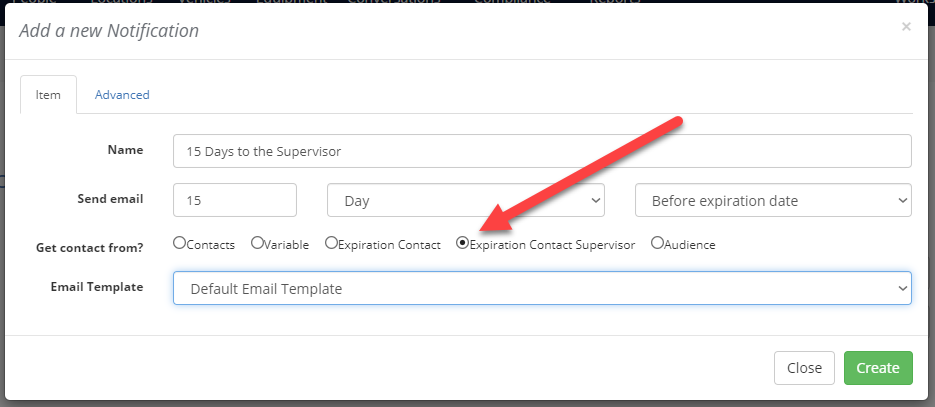
In the add notification screen you can set:
-
Name: the name of the notification step.
-
Send email: indicate when the notification will be sent. In this case, it'll be sent 15 days before the expiration date of the Expiration Item.
-
Get contact from: in this case, we select "Contact Supervisor" so it automatically sends to the Supervisor listed on the Expiration Item - but you can also select "Contacts" if you'd like to specifically add which Contact will get the notification.
-
Email Template: select if a specific email template will be used or just the default one.
Click Save and then system will start scheduling the notifications automatically. This can be applied to many situations and will vary based on your organization and their needs.
Examples of Escalation Rule Conditions
When Not to use Escalation Rules
Escalation rules aren't a good fit to recurring notifications. Let's for example you're looking to send a list of expired documents to a manager. This notification will be sent weekly or daily.
For these cases, it's better to create a custom report for the expired documents and set it on a schedule.
