Custom Fields by Type or Document Type
Find out how to add custom fields specifically to a 'type'
There may be times when a field may vary depending on the type of item.As an example, a Contact listed as "Customer" type may have a CustomerID number that a Contact listed as "Employee" type may not have. And this may be the case for your vehicle types or even your Document Types.
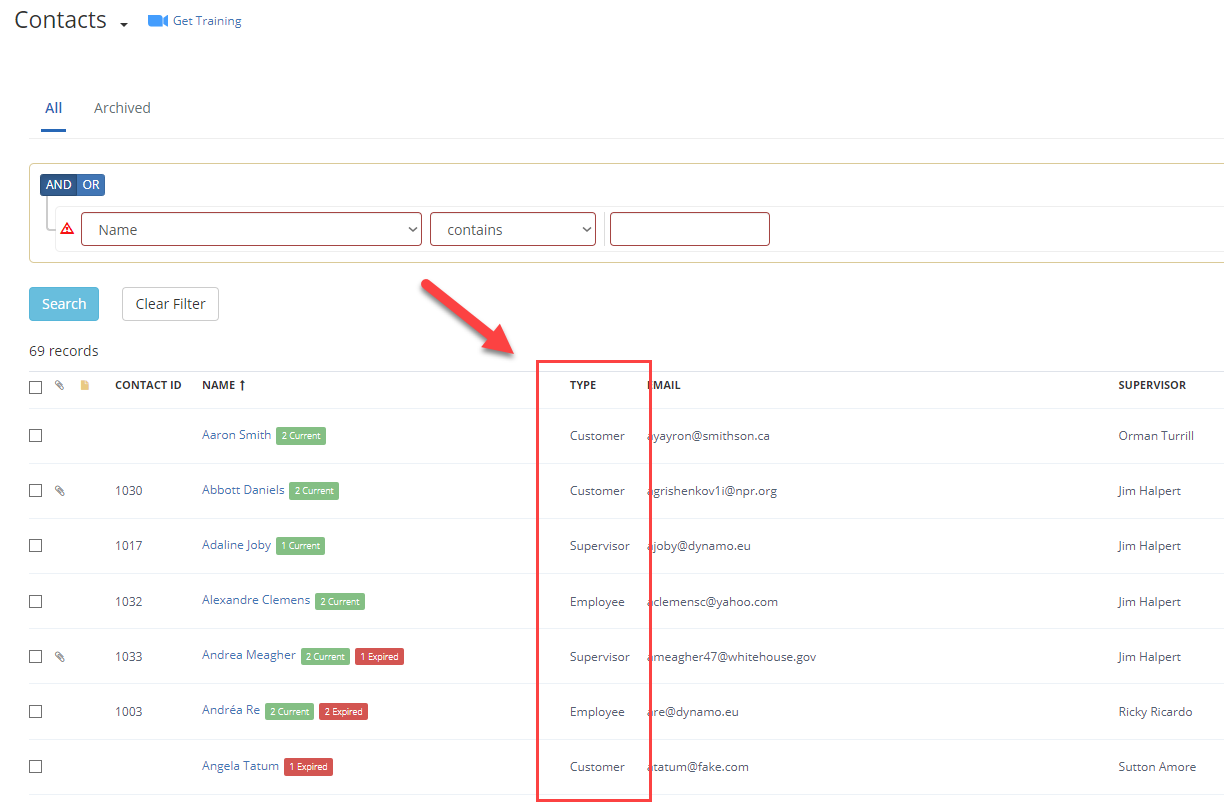
Custom fields for Item or Document types are created differently from the basic custom fields.
To configure custom fields per type click on Your Name in the top-right corner and then on Settings in the drop-down menu.
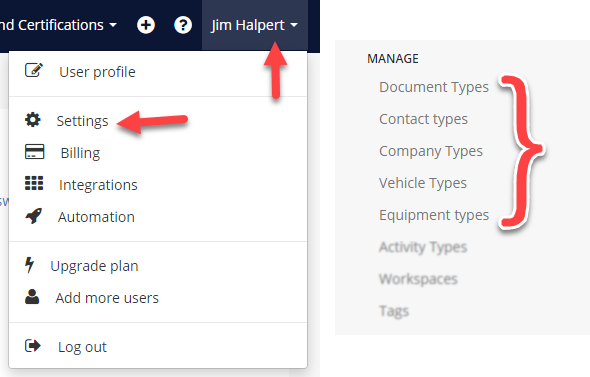
You'll find all of the different types located under the Manage heading but going forward, we will be using Contact Types for our screenshot examples.
From the list of Contact Types, click on the Custom Fields link to add a field to that specific Contact Type.

From the list of custom fields, click on the 'Add a New Field' button in the right corner to add then select the appropriate field type from the next screen.

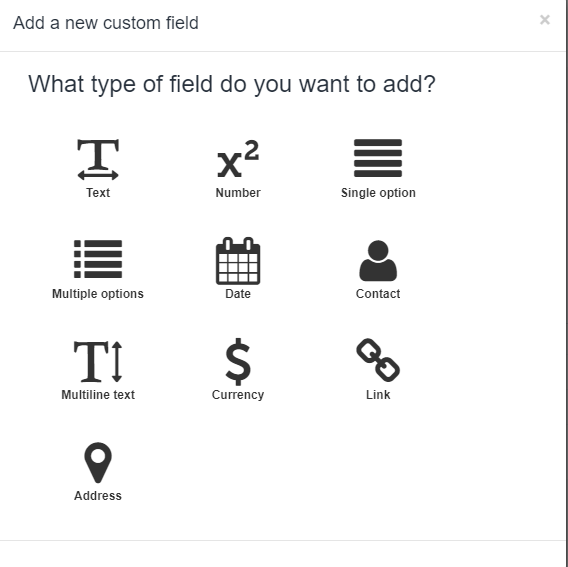
Then, from the new screen enter:
-
Name: the name of the custom field
-
Is Required: if the custom field is required
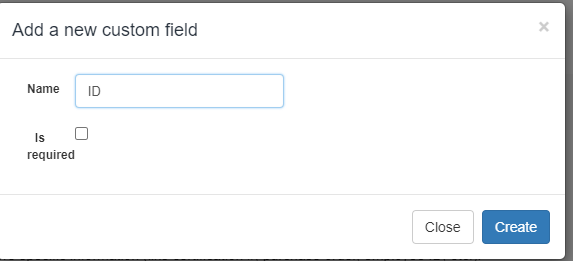
Then click Save. This field will now be available to add/edit for Contacts of this Contact type.
Entering Values for Custom Fields
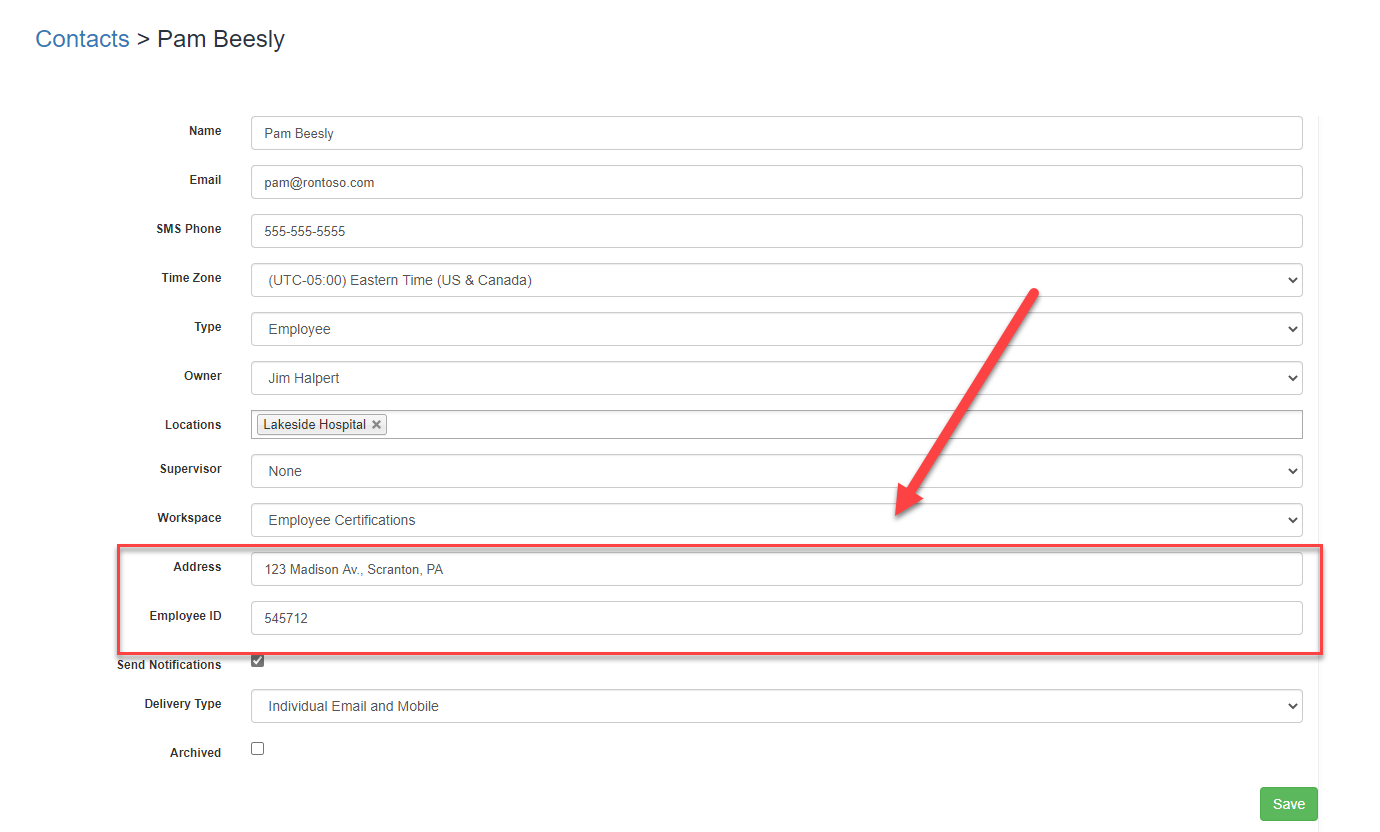
Custom fields for Contacts are shown in the Create and Edit contact screen, at the bottom of the screen. For Contact-Type custom fields to be shown, you will need to select the Contact's type before editing the custom fields.
For more detail on where you can add Custom Fields to your Expiration Reminder account, feel free to view our related article linked below.
