Automation Rules
Find out what are automations and how to automate tasks
Expiration Reminder's Automations features allows to automate repetitive tasks in Expiration Reminder. As an example, creating a set of expirations when a contact is created in the account or scheduling notifications when a specific status or category is met.
Automations may also be used with integrations to send information to other systems. An example being with our Asana integration - when an expiration is on a notify status a task is created in Asana.
Adding an Automation
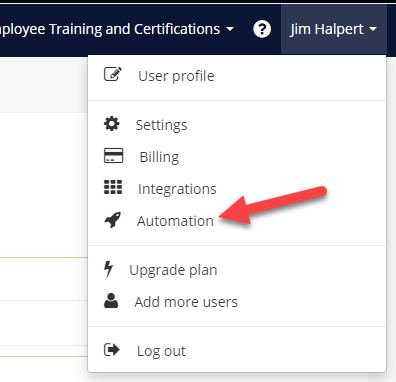
To create an Automation, click on Your Name menu and then on Automation.


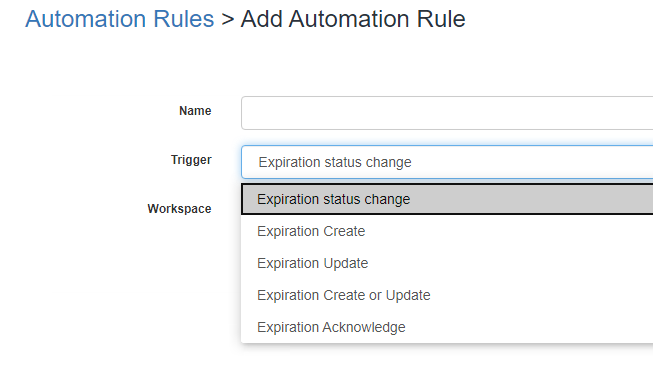
Then click on the green "+New Automation" button where you'll be prompted to enter the Name and Trigger of the Automation.

Expiration Status Changed
This event is triggered when the status of an expiration changes from one to another. For example, when an expirations changes from current to notify.
Expiration Create
This event is triggered when an expiration is created.
Expiration Update
This event is triggered when an expiration is updated.
Expiration create or update
This event is triggered when an expiration is created or updated. Either of the two.
Expiration Create or Update
This event is triggered either when the expiration is updated or created.
Expiration Acknowledge
This event is triggered when an expiration is acknowledged. Any user that acknowledges an expiration will trigger this event.
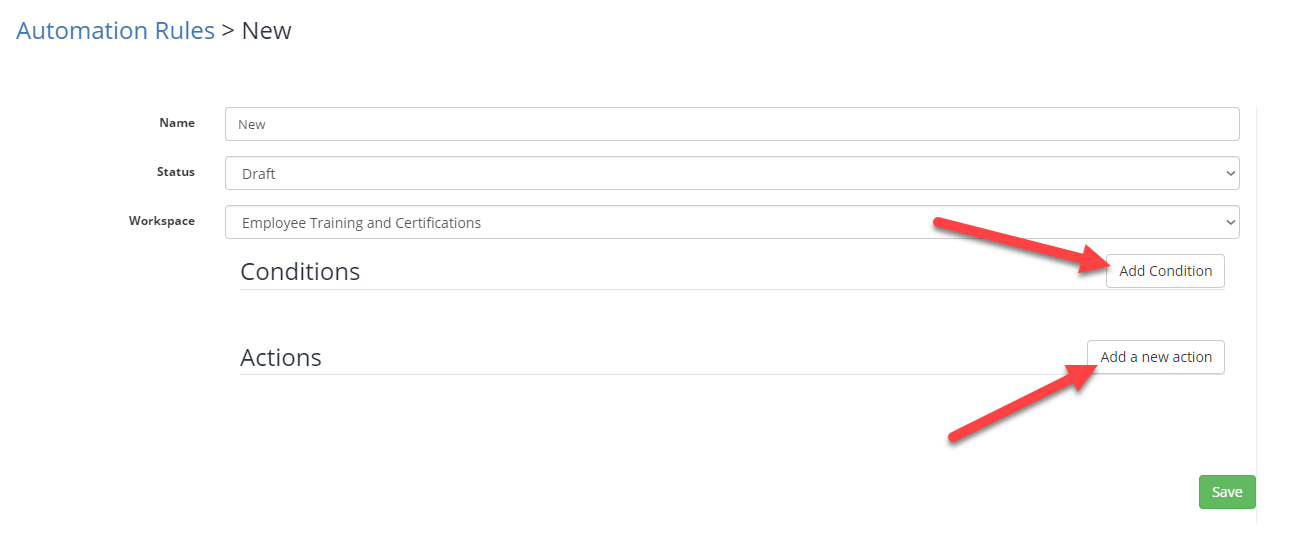
On the Automation configuration screen, enter the Conditions and the Actions.
Conditions define under what circumstances the Automation is executed.
'Actions' define what steps to execute in the 'Automation' after the 'Conditions' are met.

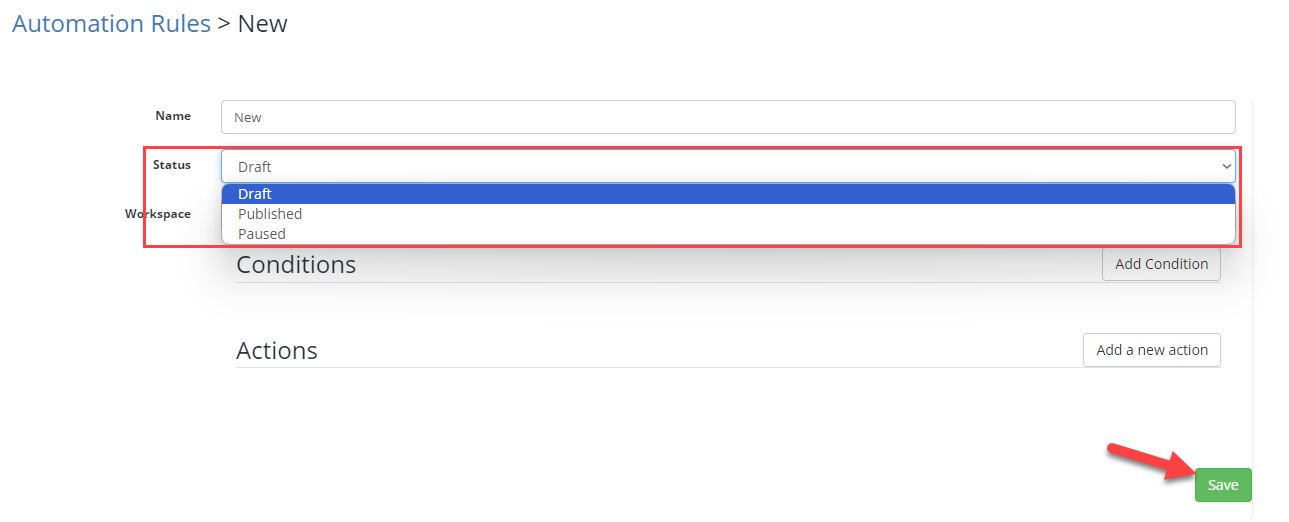
An Automation will not activate for the account until the Status of the Automation is set from 'Draft' to 'Published'. Don't forget to hit 'Save'!

To learn more about applying Automations to your Expiration Reminder account, you can view our Help Article below:
