Automatic and Recurring Renewals
Find out how to set an expiration in automatic renewal so it's renewed on its own
The Auto Renewals feature in Expiration Reminder allows expiration items to renew automatically when the expiration date arrives. This is especially useful for tracking items that are certain to be renewed and typically expire on the same date every year, such as monthly subscriptions or employee reviews.
Key Points to Keep in Mind
- Expiration items set to auto renew won’t show as expired on the dashboard because they are automatically renewed when the expiration date arrives.
- If you need to follow up to ensure an item is renewed, we recommend keeping auto renewals off for those items.
How to Configure Automatic Renewals
-
1) Access Document Types
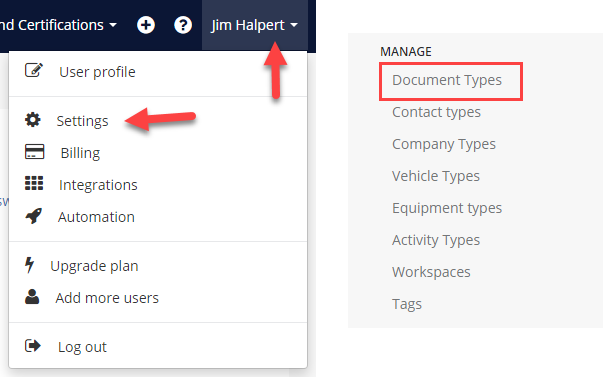
- Go to your Account Settings.
- On the left-hand side under Manage, select Document Types.

-
2) Select a Document Type
- Choose the Document Type for which you want to enable auto renewals.
-
3) Enable Auto Renewals
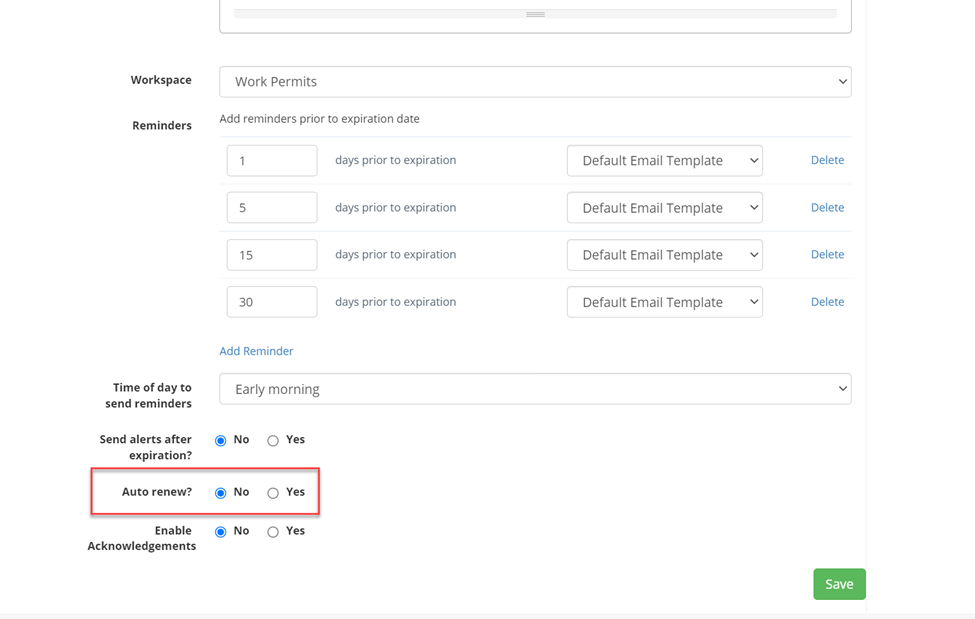
- Scroll down until you see the Auto Renew option.
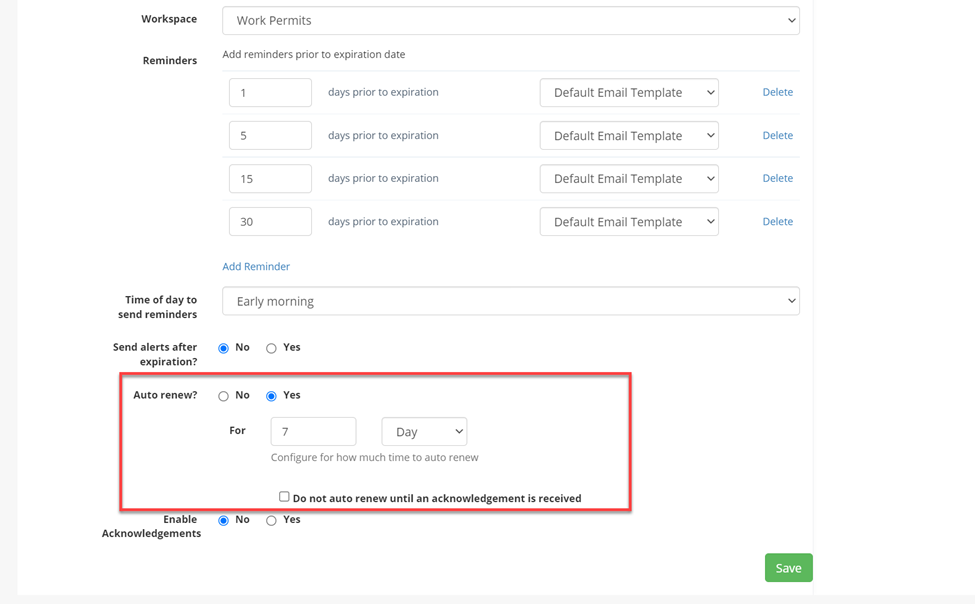
- Turn the feature ON to configure the renewal frequency.

- 4) Set Renewal Frequency
- Choose how often the item will auto-renew (e.g., every number of days, months, or years).
- Example: If an item has an expiration date of 2022-03-29 and you set auto renew for 1 year, the system will automatically renew the expiration to 2023-03-29 when the date arrives.

- 5) Save Your Changes
- After configuring the auto-renewal settings, ensure you save the changes.
Optional: Wait for Acknowledgements Before Renewing
If you’d like to ensure the contact acknowledges the renewal before it occurs:
- Tick the ‘Do not auto renew until an acknowledgement is received’ checkbox.
- Note: This option requires Acknowledgements to be enabled in your account.
- Once enabled, the system will send an email to the contacts and users in the notification system for the expiration item.
- The email will contain a URL for the user to click and acknowledge the renewal request.
For more information about Acknowledgements and how to set them up, check out our guide:
Requesting acknowledgements | Expiration Reminder Help Center
