Adding/Disabling a User
Find out how to create a new User or disable an existing User's access from your account
You can add (or invite) as many users in Expiration Reminder as needed. Users have access to the system and can login, change information and also receive notifications.
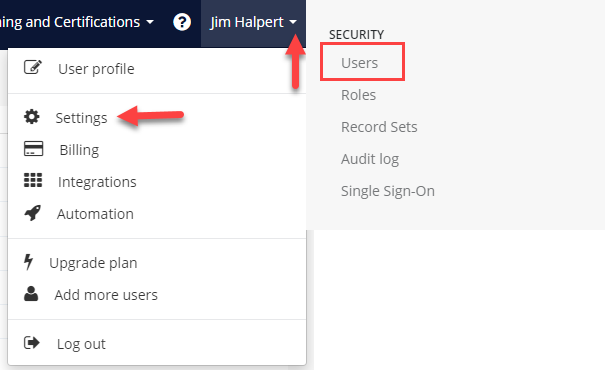
Click on Your Name on the to-right menu and then on Settings. Then click on 'Users' from the left menu under the "Security" heading.

Creating a New User
To add a New User to your account, you may then click on the green button that says 'New User'.

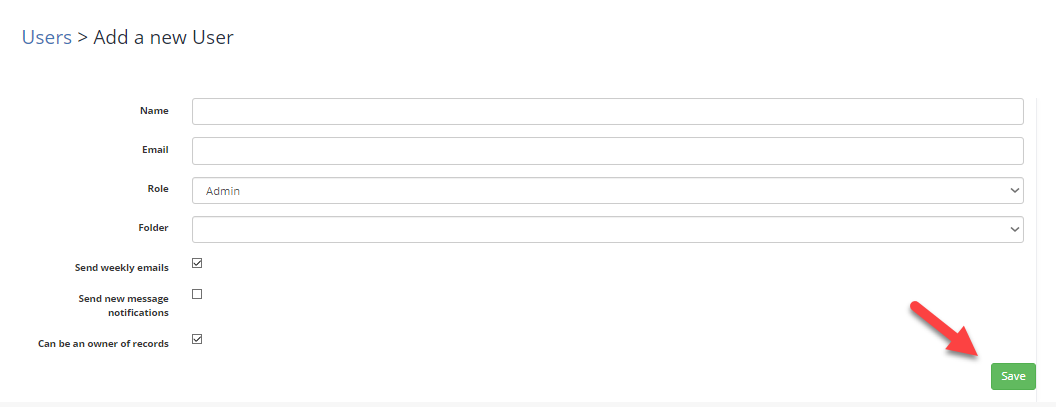
On the new User screen, you will be prompted to enter the fields below:
-
Name: the name of the user.
-
Email: the email address of the user - this will be the e-mail they use for their login.
-
Role: Select the role the user will have. This determines what permissions they have in the application.
-
Send weekly emails: indicate if the user will receive weekly summary emails.
-
Send new message notifications: indicate if the user will receive a notification when a contact replies to a message.
-
Can be an owner of records: indicate whether the user can be assigned as an owner in expirations, contacts, etc.

After clicking on 'Save', the user will receive an email with information on how to complete the registration. To complete the registration, they just need to type in a password and they’ll be given access to the application right away.
Invites to your Expiration Reminder account may be re-sent from the Users list under the "Action" column and selecting "Resend Invitation".

Disabling a User
If an employee ever leaves your organization or you decide they no longer require access to your Expiration Reminder account (moving roles, or they do not use it enough) you will need to disable their access to the Expiration Reminder account.

From the User's screen, find the User you are look to disable. In our case we are disabling Amos' User from having access.

Clicking Yes will disable the User and also archive the Contact which was made when their User was created.

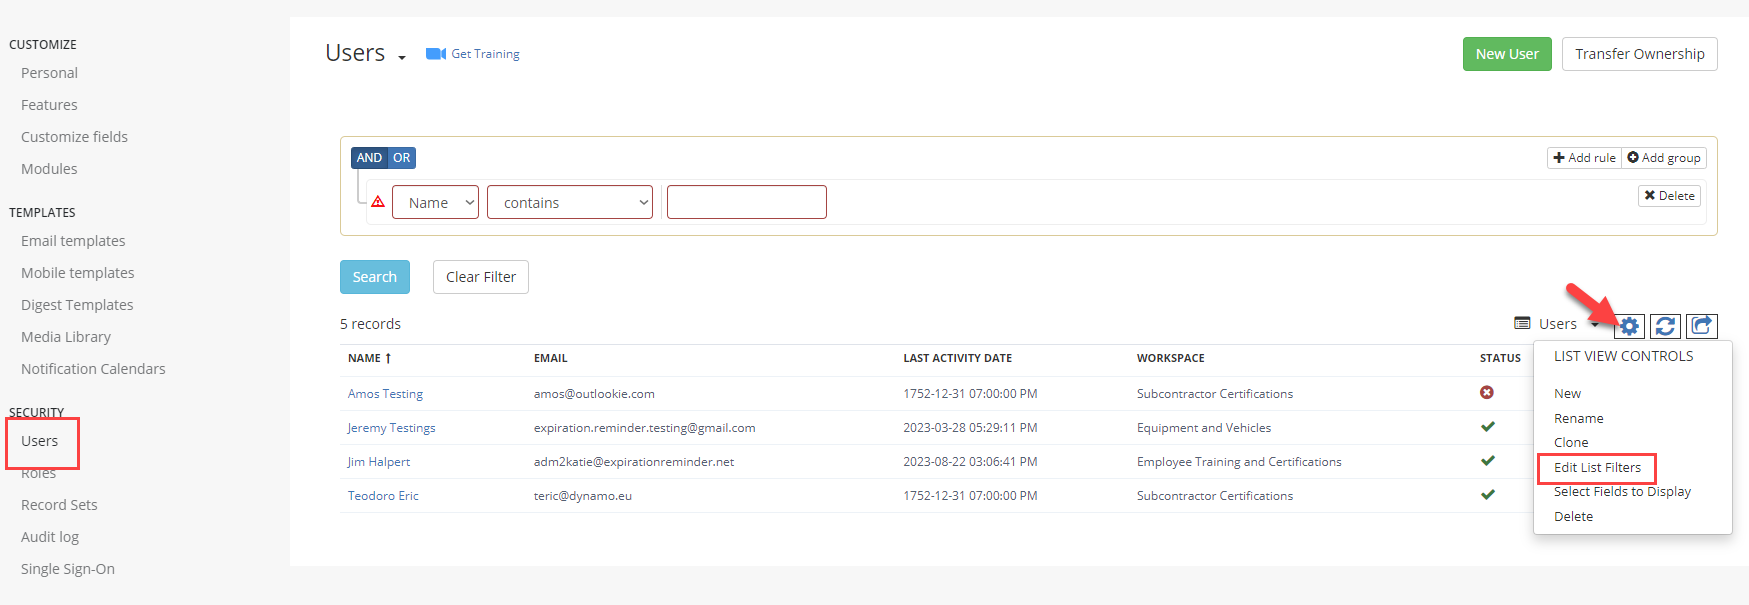
If you are unsure whether the disable went correctly, you can view in the status on the User page. Green Checkmarks indicate an active user, Red Xs indicate a disabled User.
Re-Enabling Users
You may re-enable a User the same way they were disabled - clicking the "Enable" link under the Action column will re-instate them as a User.

Hiding Disabled Users from your User List
Since Users are unable to be Deleted from the account, only disabled, it is understandable that you may want to hide them from view.
This can be achieved by editing the List Filters for your Users page. We have provided screenshots below to better assist in this tutorial.

The Gear Icon is the List View Controls. Clicking the "Edit List Filters" will prompt you to enter a rule for the page. The Rule to enter is below. This rule will only show Active Users for your Expiration Reminder account. Don't forget to save!

